Testing is crucial to ensure that your Flutter applications are reliable and work as intended. Among the different types of tests, integration tests are used to test how parts of your application work together. In Flutter we write integration tests to test how multiple widgets interact with each other. In this post, you will learn the process of setting up and running integration tests in Flutter projects. We will first explore the recommended approach, which is mainly used for mobile testing. After that, we go over an alternative approach using Flutter Driver, which works for both mobile and web.
Table of contents
Getting Started
We will start by creating a new project. This way, it will be easier to follow along and we can use the default test that comes with a new Flutter project. However, feel free to follow along with your existing project, in that case, you can move on to Installing libraries and packages.
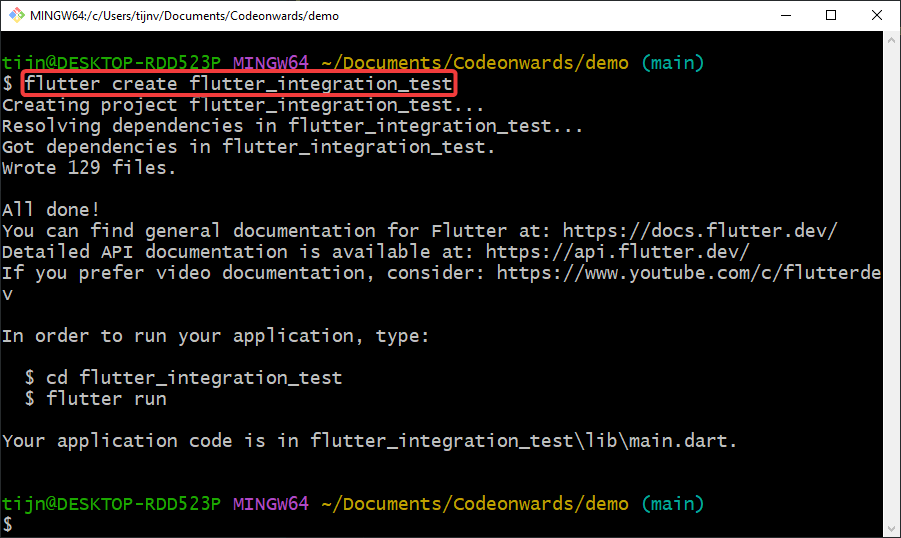
To create a new project navigate to the directory where you want to save the project and execute the following command using your preferred command line interface:
flutter create flutter_integration_testHere is an example of what it looks like when you use Git Bash:
Installing Libraries and Packages
After successfully creating our new project, we need to add the flutter_driver library and the integration_test package to our project. We also need to make sure that the flutter_test library is installed.
Before we do that open the new project in your favorite IDE. I will be using IntelliJ. We will also need a mobile device or emulator to run the integration tests. I will be using the Android emulator that is integrated into IntelliJ. You can also choose to connect your phone to the computer.
Now that our project is opened in the IDE we can start installing the libraries and packages. The installation process is simple. First, you navigate to the pubspec.yaml file of the new project and secondly you add the following lines to your dev_dependencies like so:
dev_dependencies:
  flutter_driver:
    sdk: flutter
  flutter_test:
    sdk: flutter
  integration_test:
    sdk: flutter
Once these lines are added, you can execute the following command inside your project to install these packages.
flutter pub getCreating our Integration Test in Flutter
Now that we have the necessary packages installed, let us continue to create our integration test setup. Here are the next steps:
- Inside your project’s root directory, create a new directory named
integration_test. - Copy the
widget_test.dartfile from the existingtestdirectory and paste it within this newly created directory.
|-- flutter_integration_test/
  |-- integration_test/
    |-- widget_test.dart
  |-- test/
    |-- widget_test.dart
Now we can run our first integration test by executing the following command:
flutter test integration_testThis will run every test in the integration_test directory.
If you want to run a single test file instead, you can execute the command below:
flutter test integration_test/widget_test.dartFinally, if you want to run a single test within that file you can execute this command instead:
flutter test integration_test/widget_test.dart --name="Counter increments smoke test"After executing one of the commands you will see that the integration test will run on our emulator, like the screenshot below:
If the test is taking a long time to start, you can speed it up by building the application first and then running the integration test. This will make sure that the application is already built and the test does not have to deal with it.
As you can see, creating and running integration tests is straightforward. However, there is an alternative approach available using Flutter Driver.
Create Integration Tests Using Flutter Driver
The above approach works and is easier to implement. However, by using the flutter_driver library it is possible to reuse widget tests as integration tests. Running integration tests using Flutter Driver also runs faster on my machine, so this might also be true for you
Setting up Flutter Driver
To start we need to create the following file inside our root directory: integration_test_driver.dart. With the following code:
import 'package:integration_test/integration_test_driver_extended.dart';

void main() => integrationDriver();
We also need to make slight adjustments to our widget_test.dart file inside our test directory:
import 'package:flutter/material.dart';
import 'package:flutter_integration_test/main.dart';
import 'package:flutter_test/flutter_test.dart';
import 'package:integration_test/integration_test.dart';

void main() {
  IntegrationTestWidgetsFlutterBinding.ensureInitialized();

  testWidgets('Counter increments smoke test', (WidgetTester tester) async {
    await tester.pumpWidget(const MyApp());

    expect(find.text('0'), findsOneWidget);
    expect(find.text('1'), findsNothing);

    await tester.tap(find.byIcon(Icons.add));
    await tester.pump();

    expect(find.text('0'), findsNothing);
    expect(find.text('1'), findsOneWidget);
  });
}
In this code snippet, we made the following changes:
- Added the
package:integration_test/integration_test.dart;import. - Called the
IntegrationTestWidgetsFlutterBinding.ensureInitialized();function.
Your test may look different than mine, but that should not be a problem. Just adding those 2 lines will make sure that the test will run.
Running the Integration Tests in Flutter
To run the test we can execute the following command:
flutter drive --driver=integration_test_driver.dart --target=test/widget_test.dartOnce more after executing the command, you will see that the integration test will run on our emulator, like the screenshot below:
However, running multiple tests using the flutter_driver library is not as convenient as the previous approach. For every test, we have to run the same command, of course with a different test.
Creating Bash Script
To make it easier to run multiple tests using Flutter Driver we can create a bash script. To start we need to create a integration_test.sh file inside our root directory, with the following code:
flutter drive \
  --driver=integration_test_driver.dart \
  --target=test/widget_test.dart
The slashes (\) are necessary when you want to split the command into multiple lines, otherwise the script will look like this:
flutter drive --driver=integration_test_driver.dart --target=test/widget_test.dartTo call multiple tests all we have to do is repeat the same command with a different test target:
flutter drive \
  --driver=integration_test_driver.dart \
  --target=test/widget_test.dart
flutter drive \
  --driver=integration_test_driver.dart \
  --target=test/other_test.dart
To run the script we can execute the below command:
bash integration_test.shIn the GIF below the bash script is executed with only the existing widget_test.dart:
Now you also know how to use Flutter Driver to run integration tests. This gives you the ability to reuse existing widget tests.
Which One Should You Choose?
One approach is not necessarily better than the other. However, if you want to run integration tests on the web, using Flutter Driver is the way to go. But for mobile, the decision depends on what you want.
Using the first approach is simpler and the commands to run the tests are in line with the ones you use in widget and unit tests. The downside is that you have to create an integration_test folder outside of the regular test folder. Which could mean that you end up with duplicate test files. Because your widget tests and integration tests could be the same.
If you want to reuse your existing widget tests, Flutter Driver is the better approach. As demonstrated it is very easy to change the command to select a widget test file. The downside of this approach is that you have to create a bash script and constantly update this script whenever you add new test files. With the first approach, this is not the case because running `flutter test integration_test` will run all the files inside that folder.
Conclusion
In this post, we have discussed two approaches for creating integration tests in Flutter. We started with the recommended approach which includes creating a separate directory for our integration tests and running the tests using flutter test integration_test.
For the second approach, we used the flutter_driver library which comes with the benefit of reusing widget tests in the test directory. For me it also runs the tests faster, so take that into account as well.
If you are not planning on using the Flutter Driver library make sure to remove the flutter_driver entry from your dev_dependencies in your pubspec.yaml.