In some parts of the world, it is required to ask consent from users to show personalized ads. If you are using Google AdMob they provide you with an easy approach to create those consent messages. In combination with the Google Mobile Ads package, you can integrate those consent messages easily in Flutter. In this post, we will create a consent message together and display it inside a Flutter application.
Table of contents
Requirements
To follow along ensure you have a Google AdMob account that is successfully connected to your application. If you are unsure how to accomplish this check out the Requirements and Getting Started with Google Mobile Ads paragraphs of the Flutter Ads with Google AdMob article.
To create consent messages, a privacy policy must be added to your application. The privacy policy needs to be hosted online because the only way to add it to your application is by providing a link. Here is an example of a privacy policy. Note that it is also a requirement to deploy your application in the Google Play Store.
Creating a Consent Message in AdMob
Before we can show a consent message in our Flutter application we first have to create one. Luckily this can easily be done in Google AdMob by following the steps below:
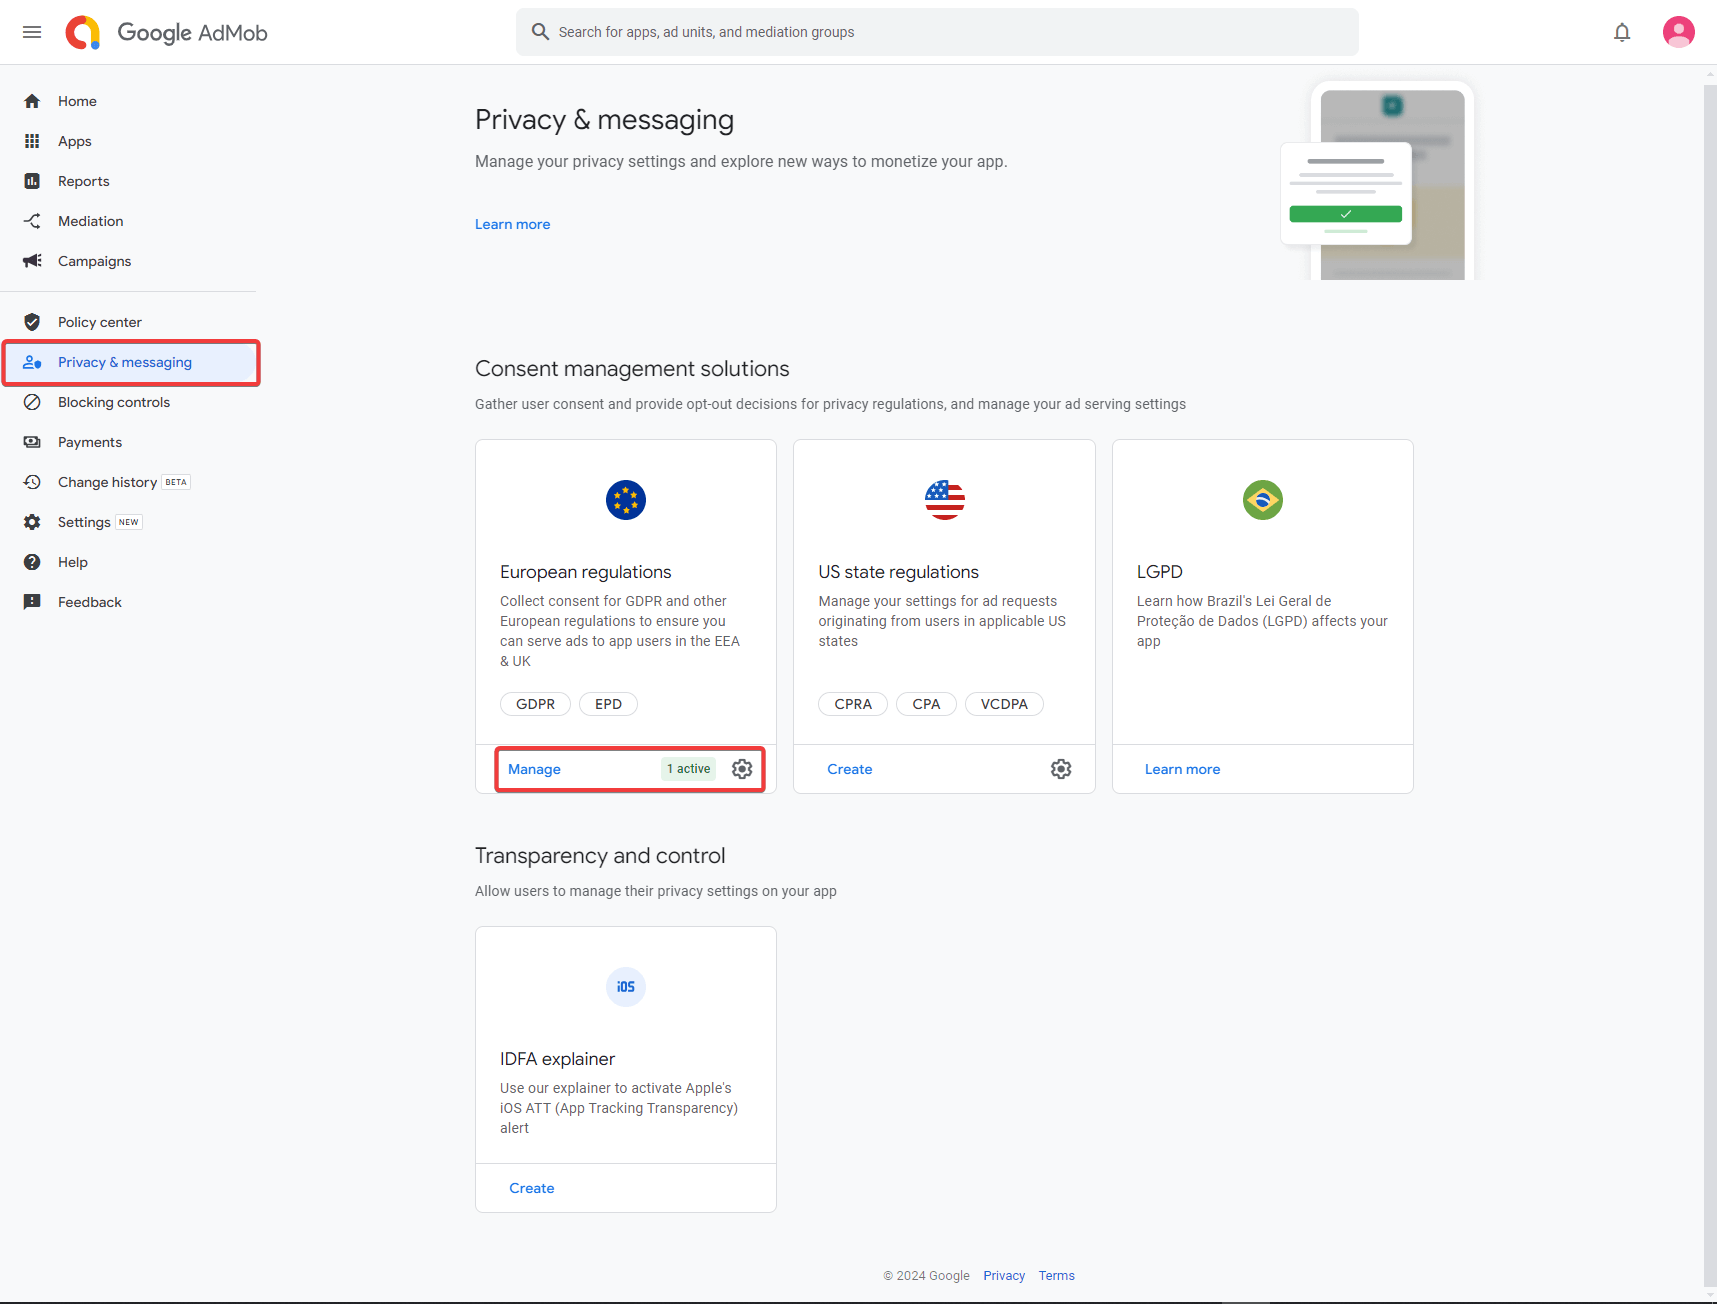
1. Once logged in to Google AdMob we start by navigating to Privacy & Messaging page. There you will find multiple Consent management solutions. In this tutorial, we will be going with the European regulations. In the screenshot below you can see that I already have a Manage button, but you will probably see a Create button. Click on the Create button.
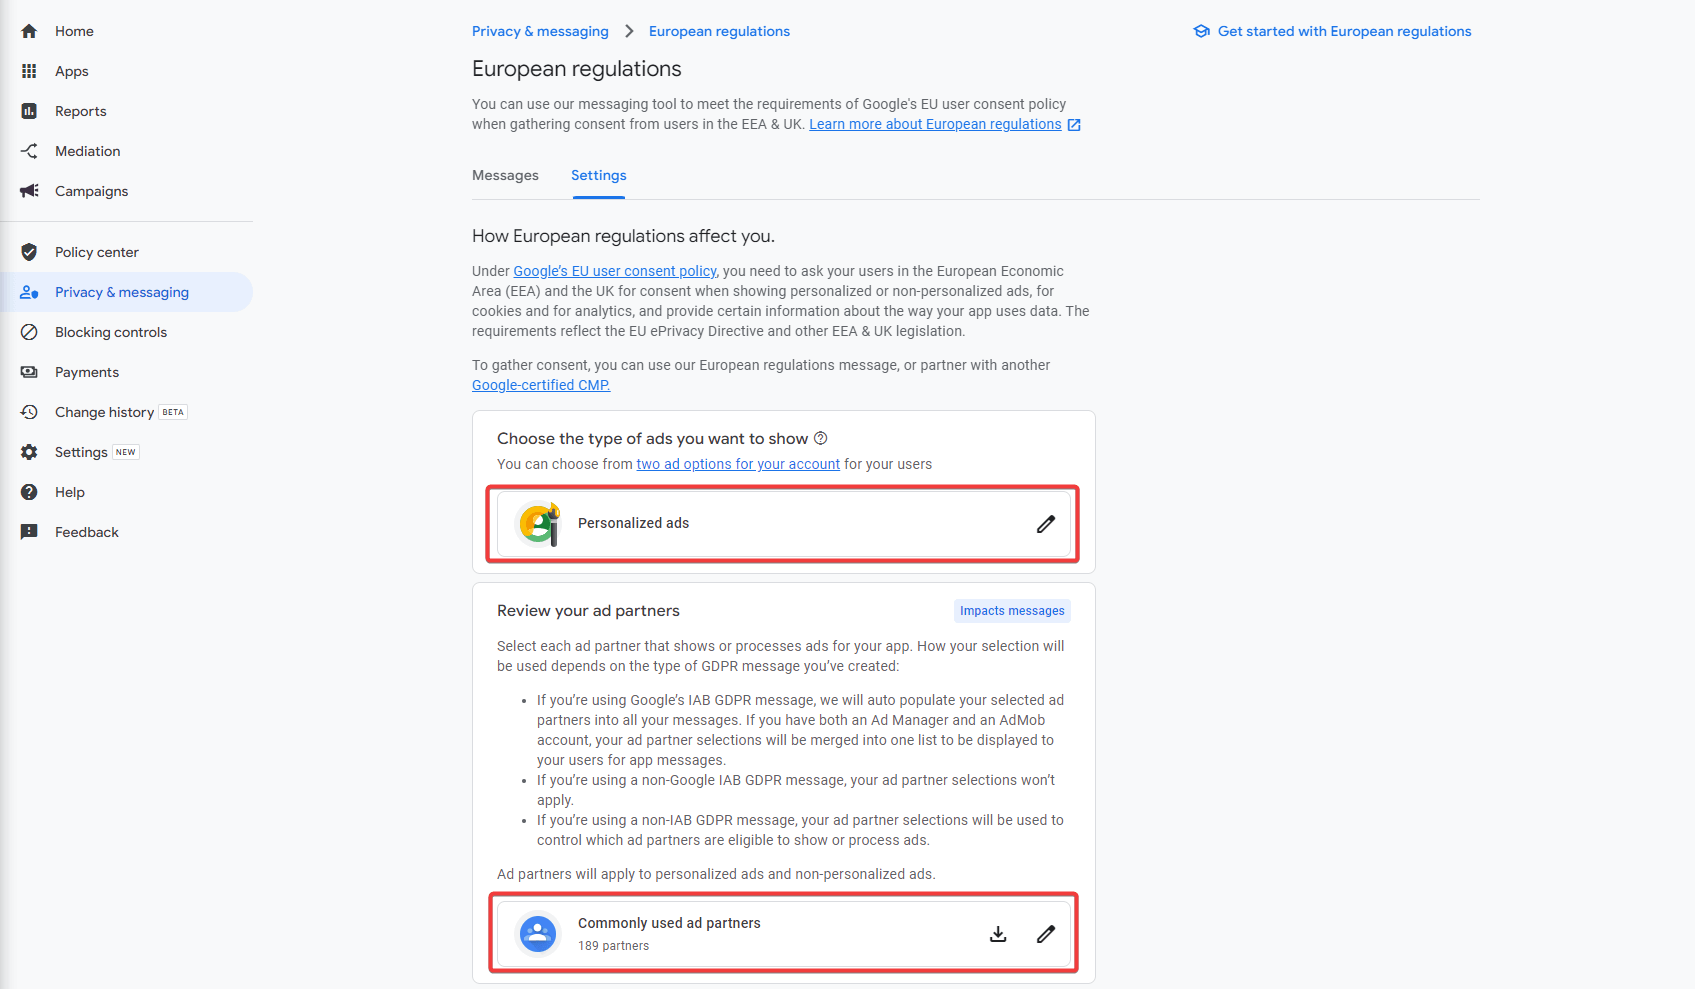
2. After clicking Create you will see the following screen. On this screen, you can select whether you want to show personalized or non-personalized ads. Other than that you can select your ad partners. These configurations can always be changed later so for the sake of the tutorial I will leave them on the default. Feel free to adjust them according to your needs.
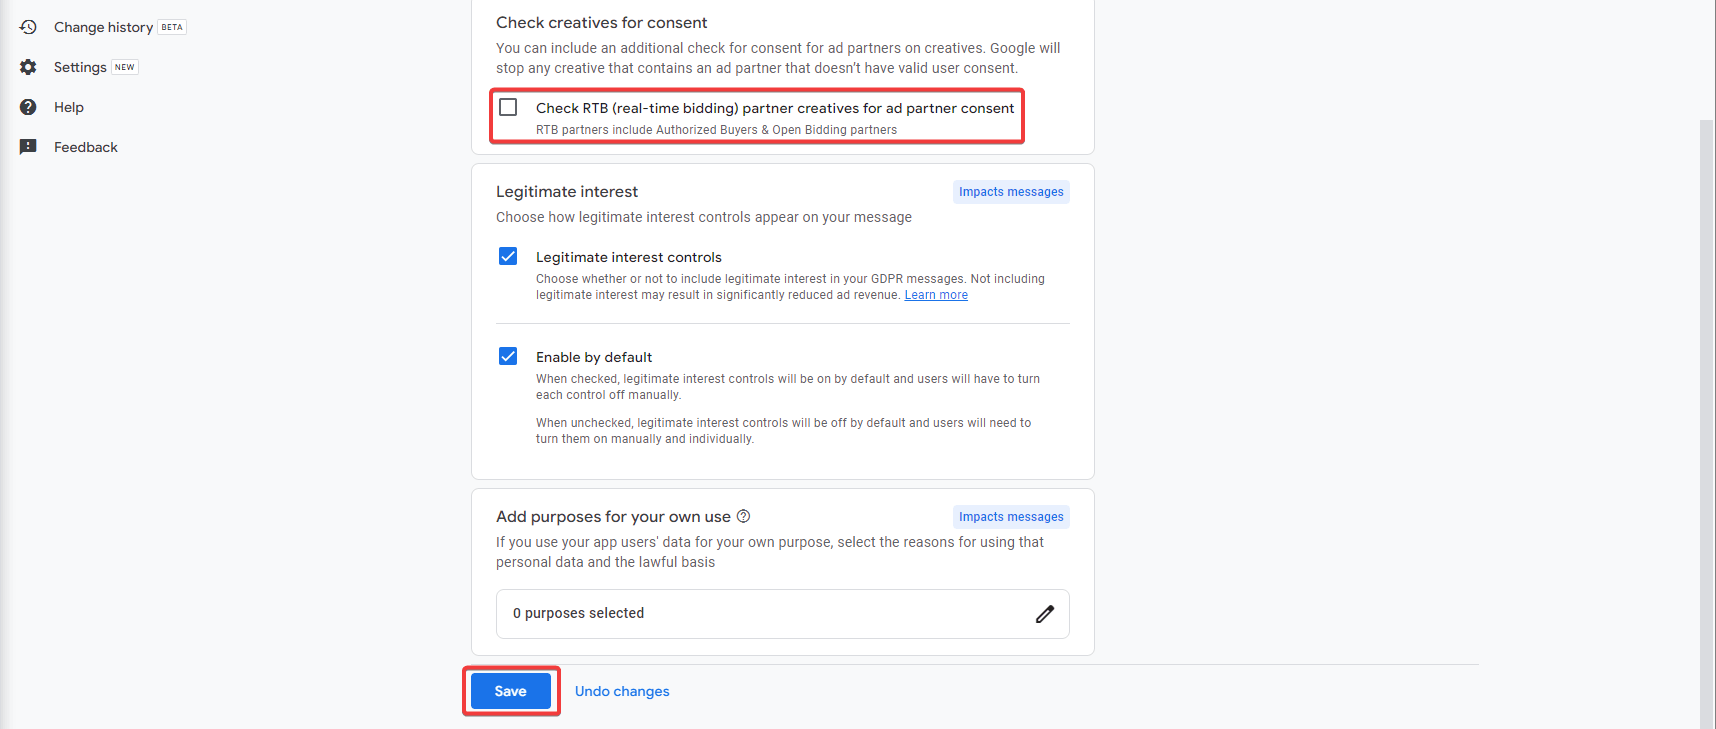
3. On the same page there are a couple of checkboxes to consider. Once again I will opt for the defaults, however, feel free to adjust them to your needs. After you are finished make sure to click on Save.
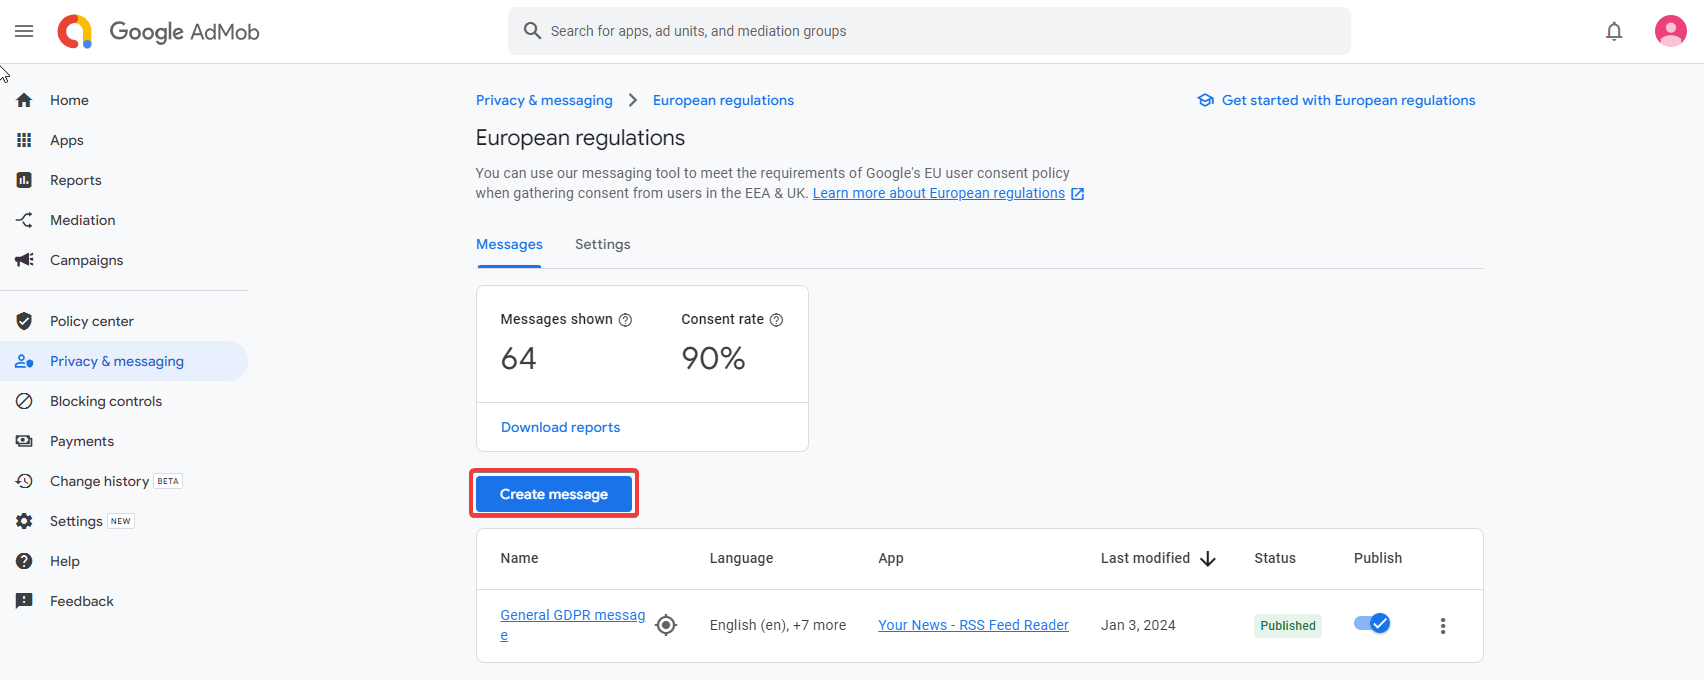
4. Having configured the settings for the European regulations, we can move on to the consent message by clicking the Create message button.
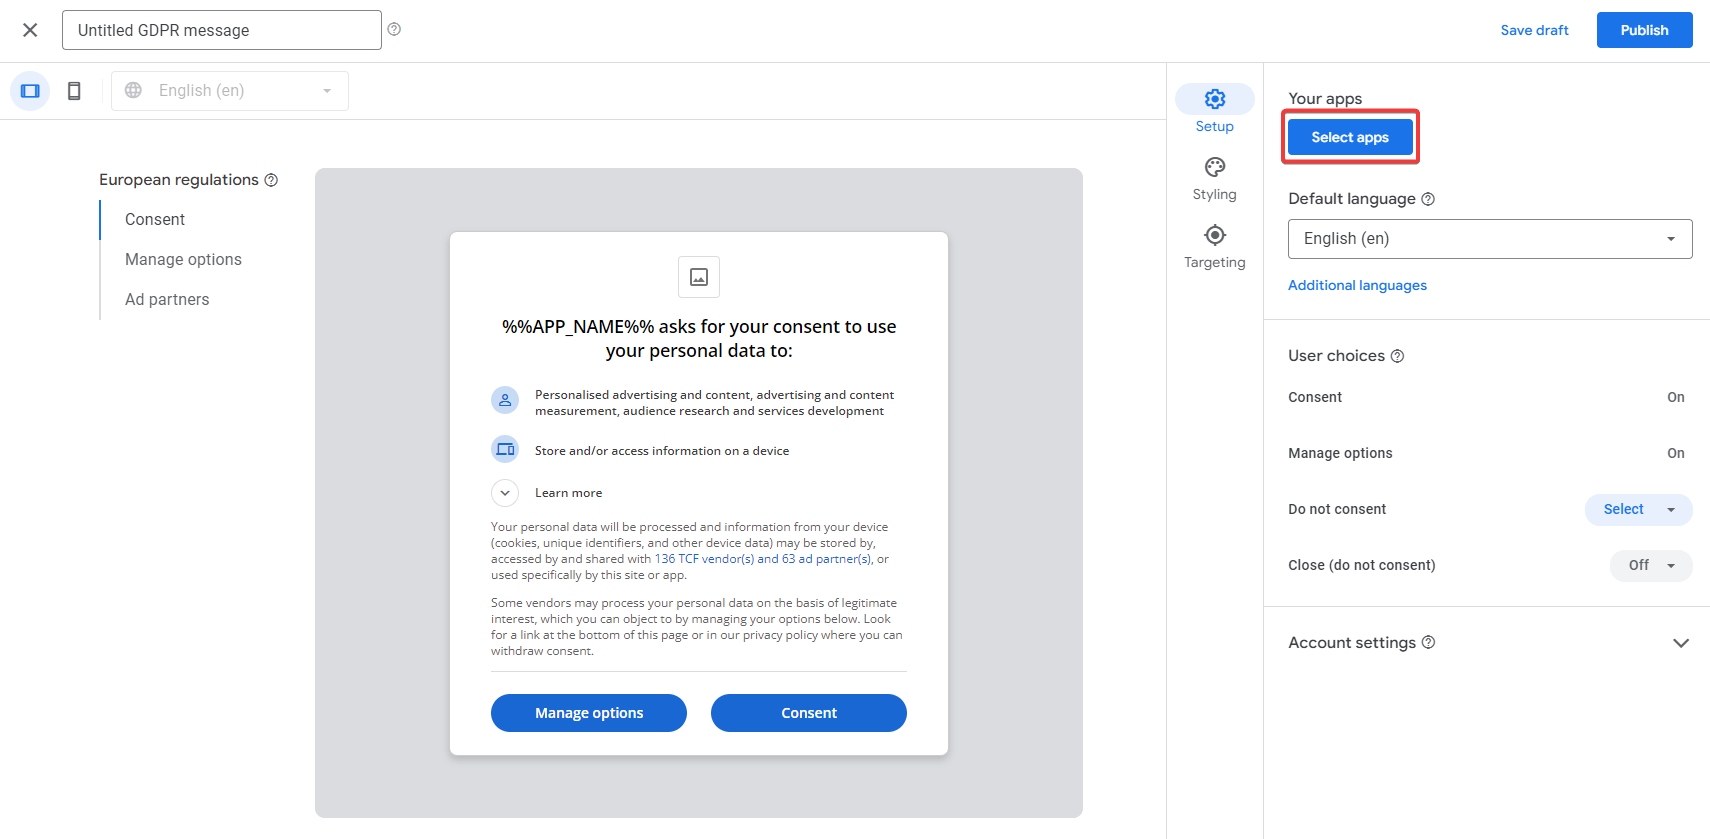
5. On the following screen we can customize the consent message. First of all, let us select the application we want to create the consent message for by clicking the Select apps button.
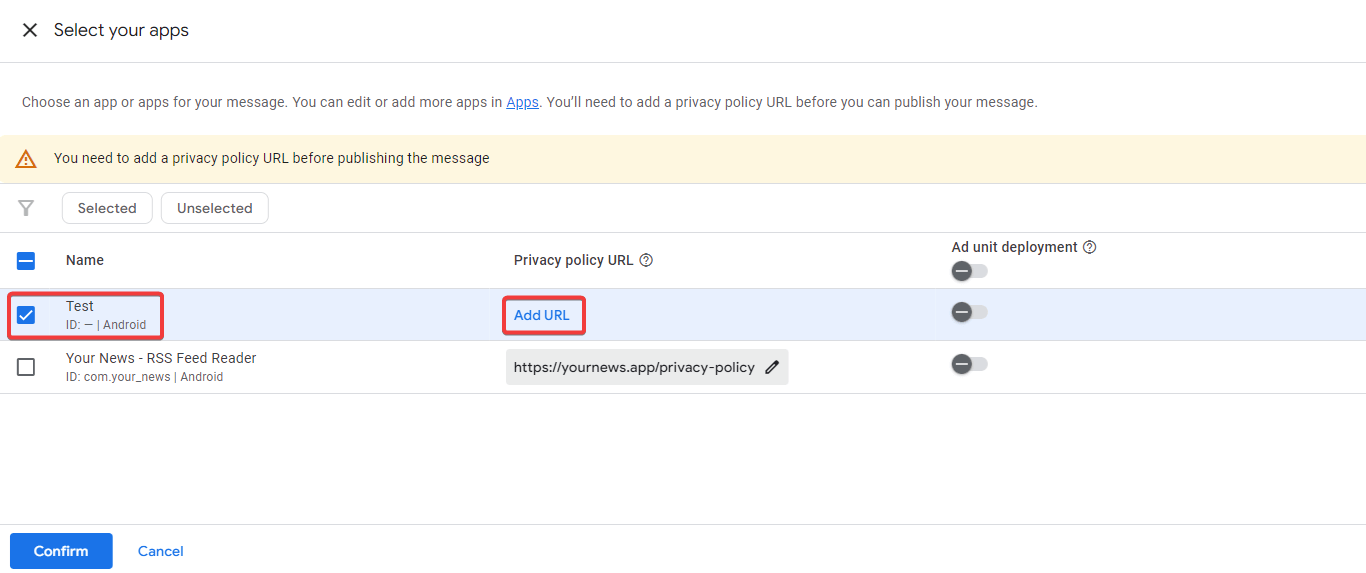
6. Right now, we will have a screen where we can see all our applications. Select your application and make sure to add your privacy policy link by clicking Add URL.
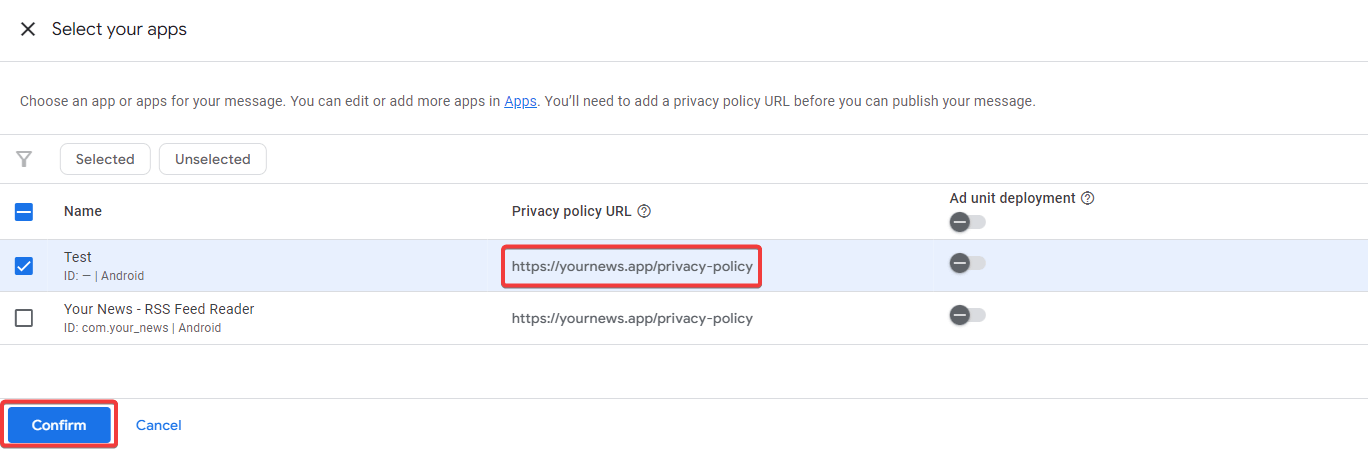
7. Once you have added your privacy policy link you can click Confirm.
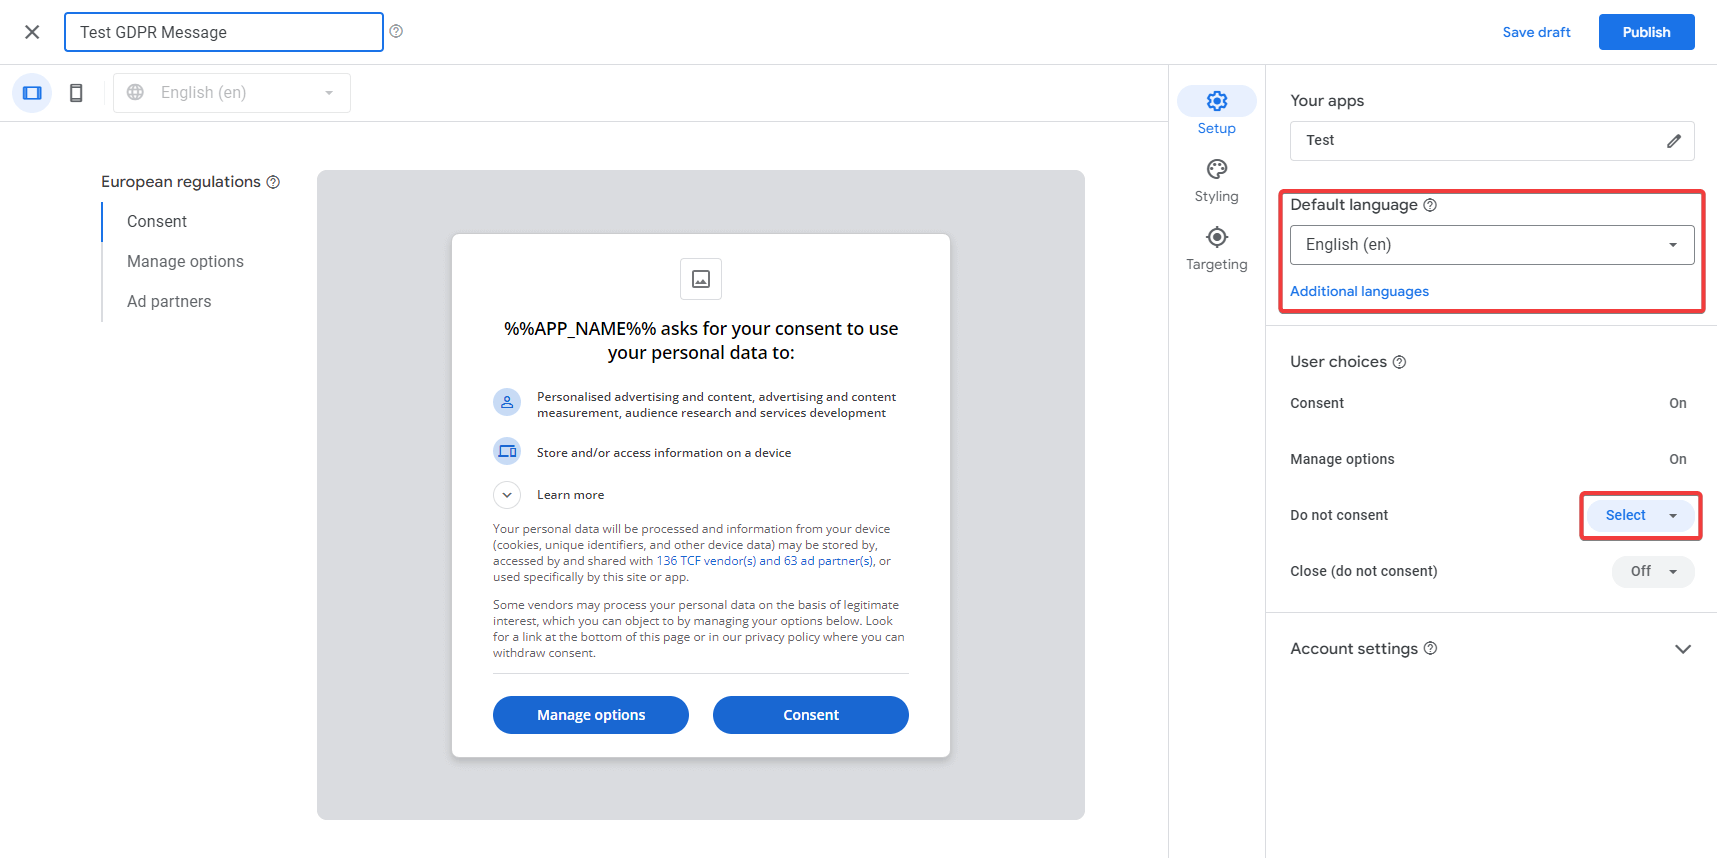
8. Now we want to select the default language, which in my case will be English. It is also possible to add additional languages. We are also required to decide whether we want to allow users not to consent. I have opted for off.
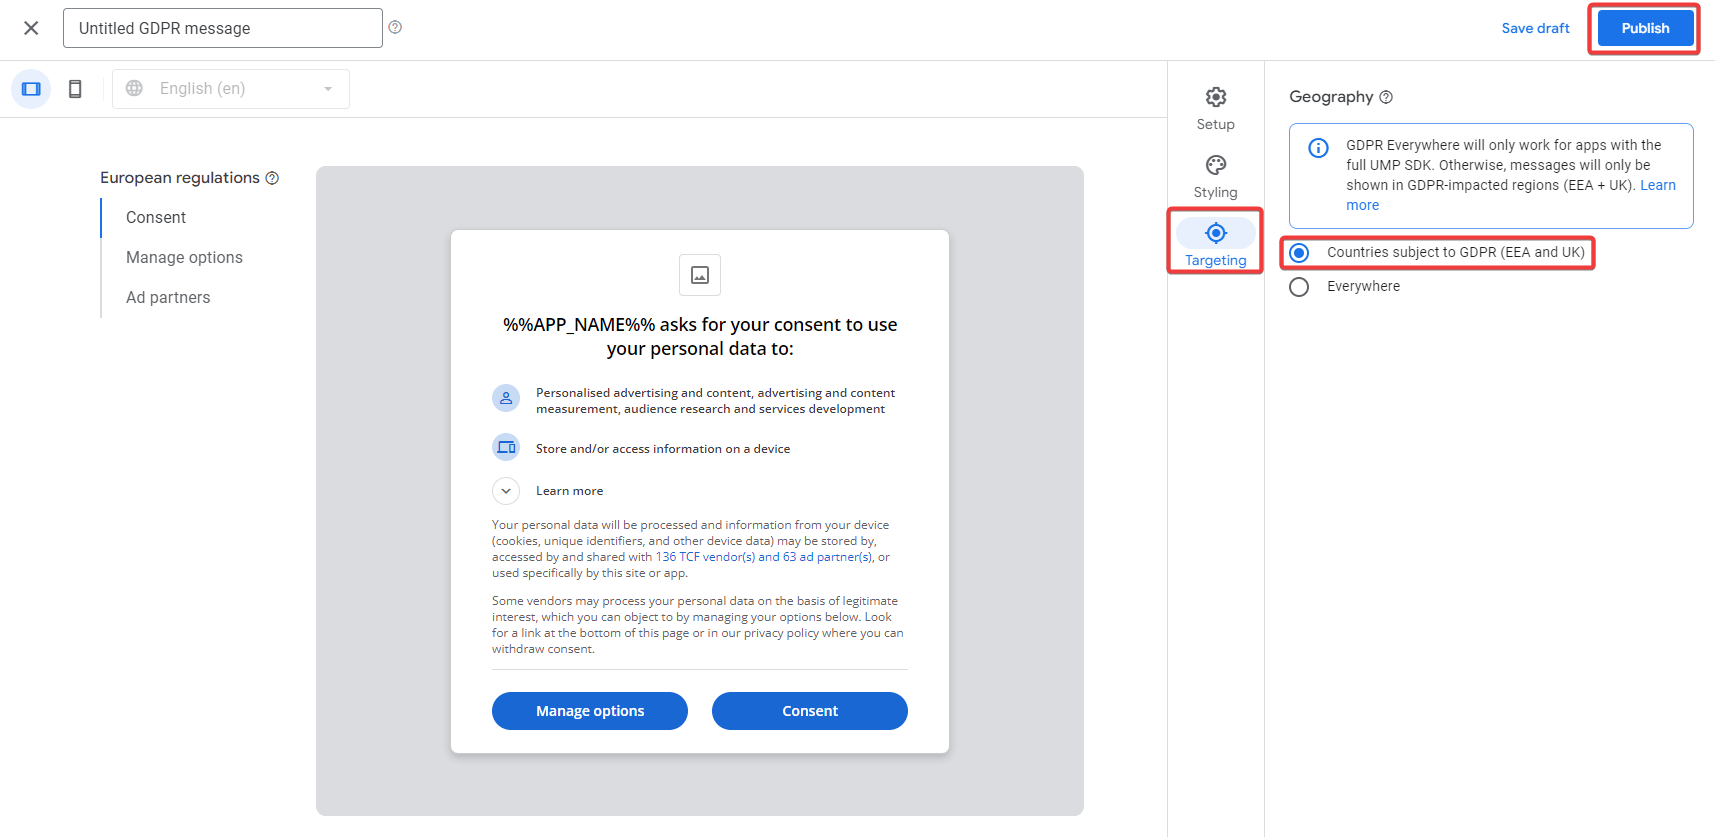
9. If you want you can adjust the styling of the consent message. Aftward make sure that you click on Targeting before publishing. We want to ensure we only show this consent message to European users. It does not make sense to show this to all the users. Once selected, you can click Publish to publish the message.
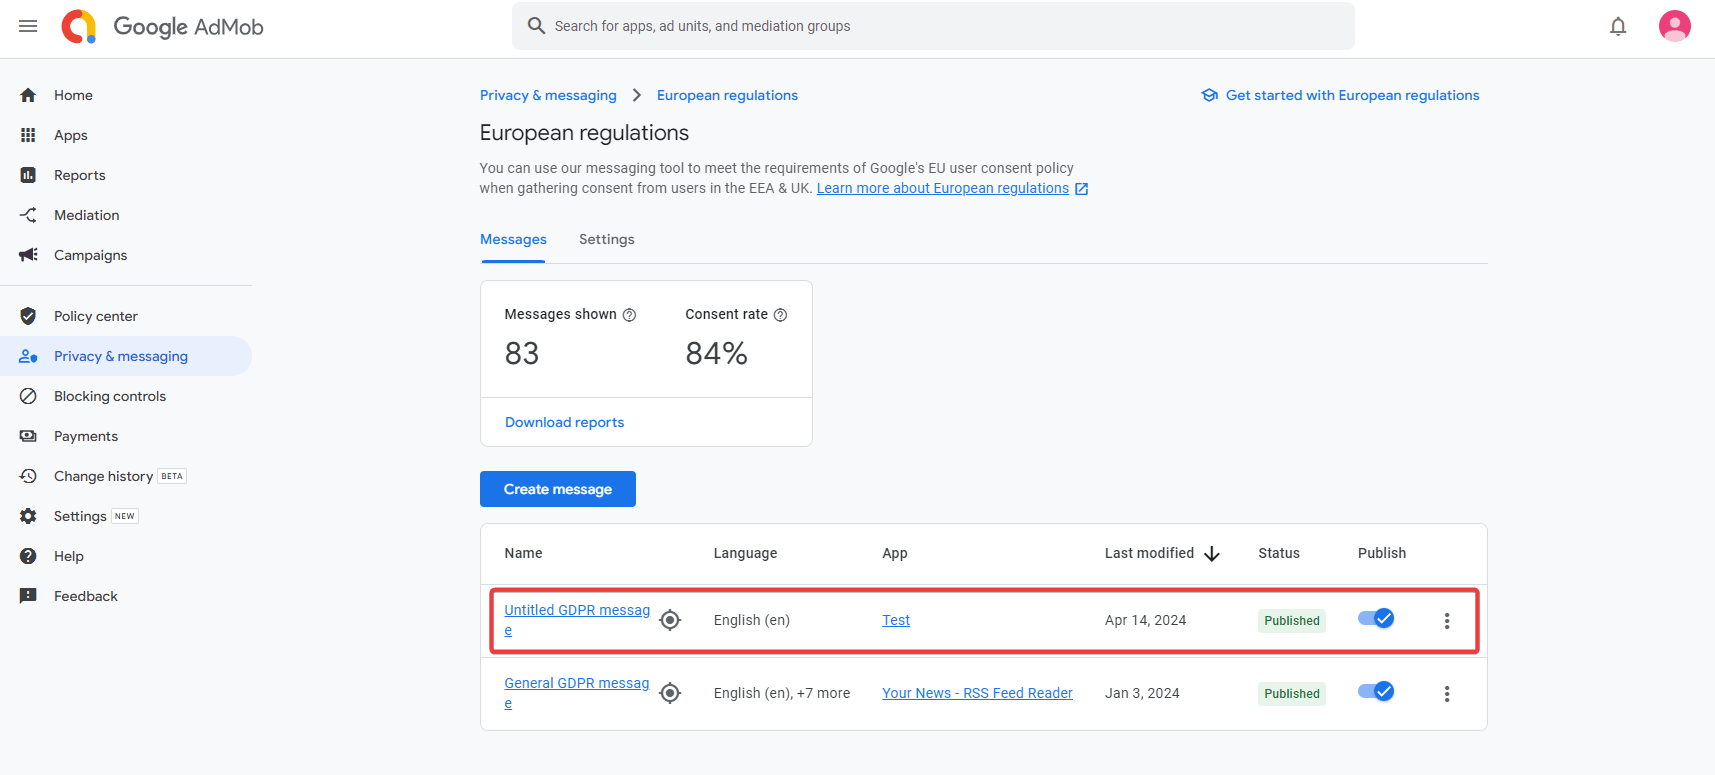
10. As you can see in the European regulations overview our new message is shown. Make sure that the Status of the message is set to Published. Google AdMob mentions that it can take up to 10 minutes before it will be available for display.
Implementing the AdMob Consent Message in Flutter
As mentioned in the requirements part of this post ensure that you have installed the Google Mobile Ads package and connected your project with Google AdMob.
The Flutter implementation itself is quite simple and should happen at the startup of your application. See the code below:
import 'package:flutter/material.dart';
import 'package:google_mobile_ads/google_mobile_ads.dart';

Future<void> main() async {
  WidgetsFlutterBinding.ensureInitialized();
  MobileAds.instance.initialize();

  void loadForm() {
    ConsentForm.loadConsentForm(
      (ConsentForm consentForm) async {
        final consentStatus =
            await ConsentInformation.instance.getConsentStatus();

        if (consentStatus == ConsentStatus.required) {
          consentForm.show((FormError? formError) => loadForm());
        }
      },
      (FormError formError) {},
    );
  }

  ConsentInformation.instance.requestConsentInfoUpdate(
    ConsentRequestParameters(),
    () async {
      if (await ConsentInformation.instance.isConsentFormAvailable()) {
        loadForm();
      }
    },
    (FormError formError) {},
  );

  runApp(const MyApp());
}

class MyApp extends StatelessWidget {
  const MyApp({super.key});

  @override
  Widget build(BuildContext context) {
    return const MaterialApp(
      home: Scaffold(),
    );
  }
}
To ensure that you understand what is happening let us go over the implementation together.
We started with initializing the MobileAds instance. However, before we can do this we have to make sure that the WidgetsFlutterBinding is initialized.
WidgetsFlutterBinding.ensureInitialized();
MobileAds.instance.initialize();
After initialization, we create a loadForm function that will load the ConsentForm for us. Inside the function, we call the ConsentForm.loadConsentForm function which is from the Google Mobile Ads package.
Inside this function, we can add 2 callbacks, one for the successListener and one for the failureListener. The failureListener provides us with a FormError instance that can be used to deal with errors. The successListener provides us a ConsentForm, on this ConsentForm instance we can call the show function to show our consent message. Inside the show function, we added a callback that will reopen the form once it is closed when the user has not given us a choice yet.
However, before we show the form we want to ensure that consent is required. As explained earlier this message will only be shown to users in the EU. We can ensure this by requesting the ConsentStatus by calling ConsentInformation.instance.getConsentStatus. The result from this function will give us the current status and inside our loadForm we check if this is equal to the ConsentStatus.required. When this is true we will load our form.
void loadForm() {
  ConsentForm.loadConsentForm(
    (ConsentForm consentForm) async {
      final consentStatus =
          await ConsentInformation.instance.getConsentStatus();

      if (consentStatus == ConsentStatus.required) {
        consentForm.show((FormError? formError) => loadForm());
      }
    },
    (FormError formError) {},
  );
}
At last, we want to call our loadForm function inside the ConsentInformation.instance.requestConsentInfoUpdate function in the successListener callback. However, we want to make sure that our consent message is available and we do this by checking if ConsentInformation.instance.isConsentFormAvailable() is true.
ConsentInformation.instance.requestConsentInfoUpdate(
  ConsentRequestParameters(),
  () async {
    if (await ConsentInformation.instance.isConsentFormAvailable()) {
      loadForm();
    }
  },
  (FormError formError) {},
);
When we run this code you will see that our message is shown on screen.
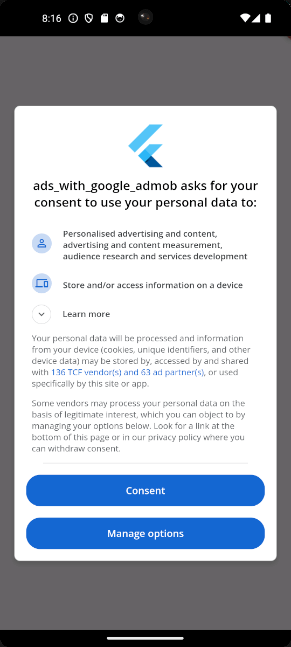
If you are using an emulator this will be a test version of the consent message. For any other device, it will be the actual consent message. We have to ensure that your development devices will also be recognized as test devices.
Adding ConsentDebugSettings
With the previous code, we successfully showed a consent message to our users. However, in an emulator, it will automatically show us a test consent message. We also want to ensure that we get a test consent message on our development devices. Therefore we have to configure our debug settings. This can be achieved with the highlighted code:
import 'package:flutter/material.dart';
import 'package:google_mobile_ads/google_mobile_ads.dart';

Future<void> main() async {
  WidgetsFlutterBinding.ensureInitialized();
  MobileAds.instance.initialize();

  void loadForm() {
    ConsentForm.loadConsentForm(
      (ConsentForm consentForm) async {
        final consentStatus =
            await ConsentInformation.instance.getConsentStatus();

        if (consentStatus == ConsentStatus.required) {
          consentForm.show((FormError? formError) => loadForm());
        }
      },
      (FormError formError) {},
    );
  }

  final testIdentifiers = ['2793ca2a-5956-45a2-96c0-16fafddc1a15'];

  ConsentInformation.instance.requestConsentInfoUpdate(
    ConsentRequestParameters(
      consentDebugSettings: ConsentDebugSettings(
        debugGeography: DebugGeography.debugGeographyEea,
        testIdentifiers: testIdentifiers,
      ),
    ),
    () async {
      if (await ConsentInformation.instance.isConsentFormAvailable()) {
        loadForm();
      }
    },
    (FormError formError) {},
  );

  runApp(const MyApp());
}

class MyApp extends StatelessWidget {
  const MyApp({super.key});

  @override
  Widget build(BuildContext context) {
    return const MaterialApp(
      home: Scaffold(),
    );
  }
}
Inside the ConsentInformation.instance.requestConsentInfoUpdate function, we can provide an ConsentDebugSettings instance. Inside this instance, we can add our test identifiers (Advertising IDs) and the debug geography which is set to DebugGeography.debugGeographyEea. If you are unsure how to get the Advertising ID of your device check out Getting the Ad Test ID from AdMob.
At last, you can reset the ConsentInformation instance by calling the below function. This can be helpful during development if you have already clicked on Consent for example and you want the message to reappear. Of course, this function can also be used in production if you want to allow users to reset their Consent.
ConsentInformation.instance.reset();Conclusion
As you can see implementing consent messages in Flutter using Google AdMob is straightforward. You just have to know where to look and what packages to use. I also tried to make this post concise, so you do not have to waste much time on implementing it. If you need additional information feel free to check out the official documentation or leave a comment down below.


