You might be familiar with using packages in your Flutter applications. It is also possible to create your own Flutter and Dart packages. These can be for personal use or distributed on pub.dev for public access. Unfortunately, pub.dev does not support hosting private packages. Fortunately, we can host private Flutter and Dart packages using Cloudsmith.
Table of contents
Setting up Cloudsmith
Cloudsmith is a cloud-native artifact management platform designed for the secure development and distribution of software. With native support for Dart, Cloudsmith simplifies the management of Flutter and Dart packages. Additionally, Cloudsmith’s advanced authentication features ensure that only authorized users can access or modify your packages.
Create an Account
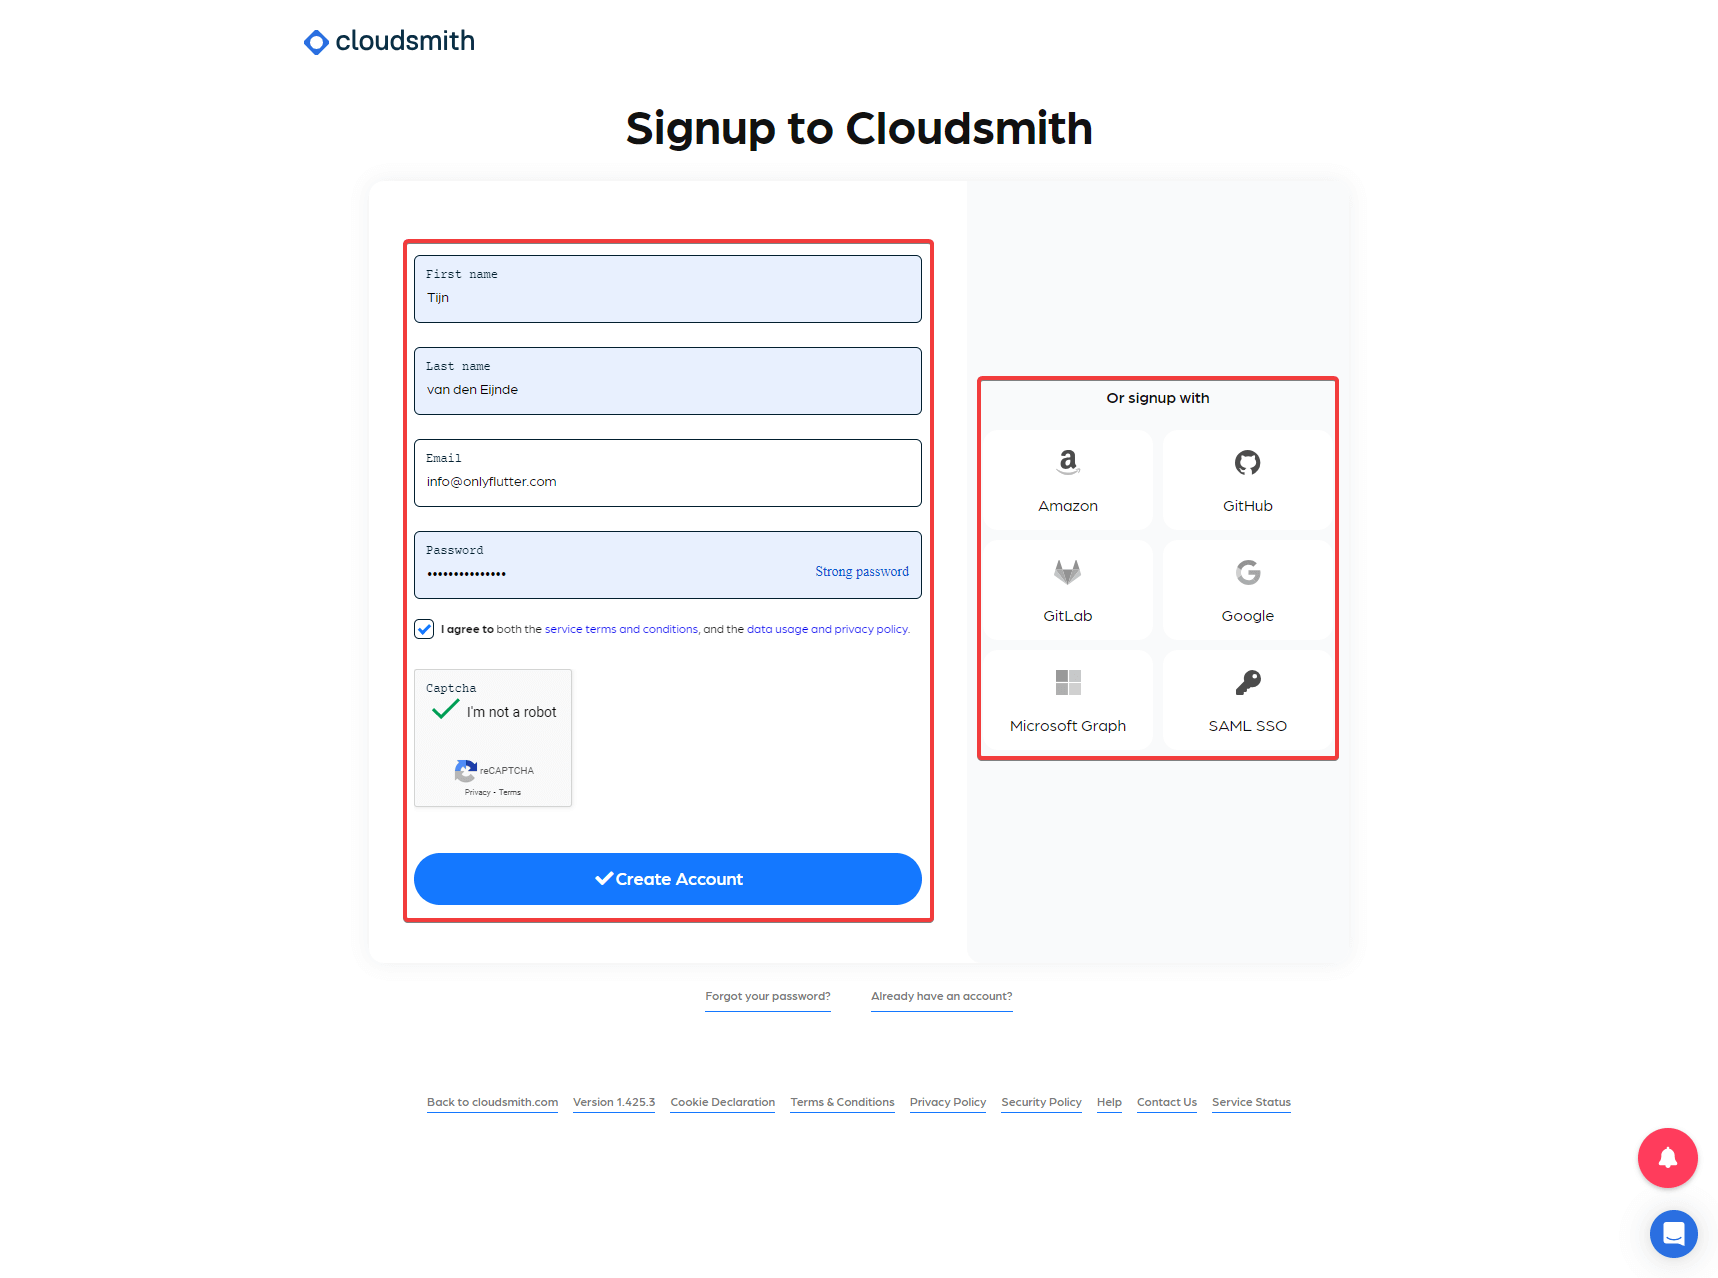
To start we first want to create a Cloudsmith account. Once you have opened the link you can decide whether to create a new account or sign up using any other option.
Create an Organization
After creating your account you will have the option to either join an existing organization or create your own. In this case, we are going to create our own.
Ensure you fill in the Organization Name, agree to the Terms of Service, and finish the Captcha.

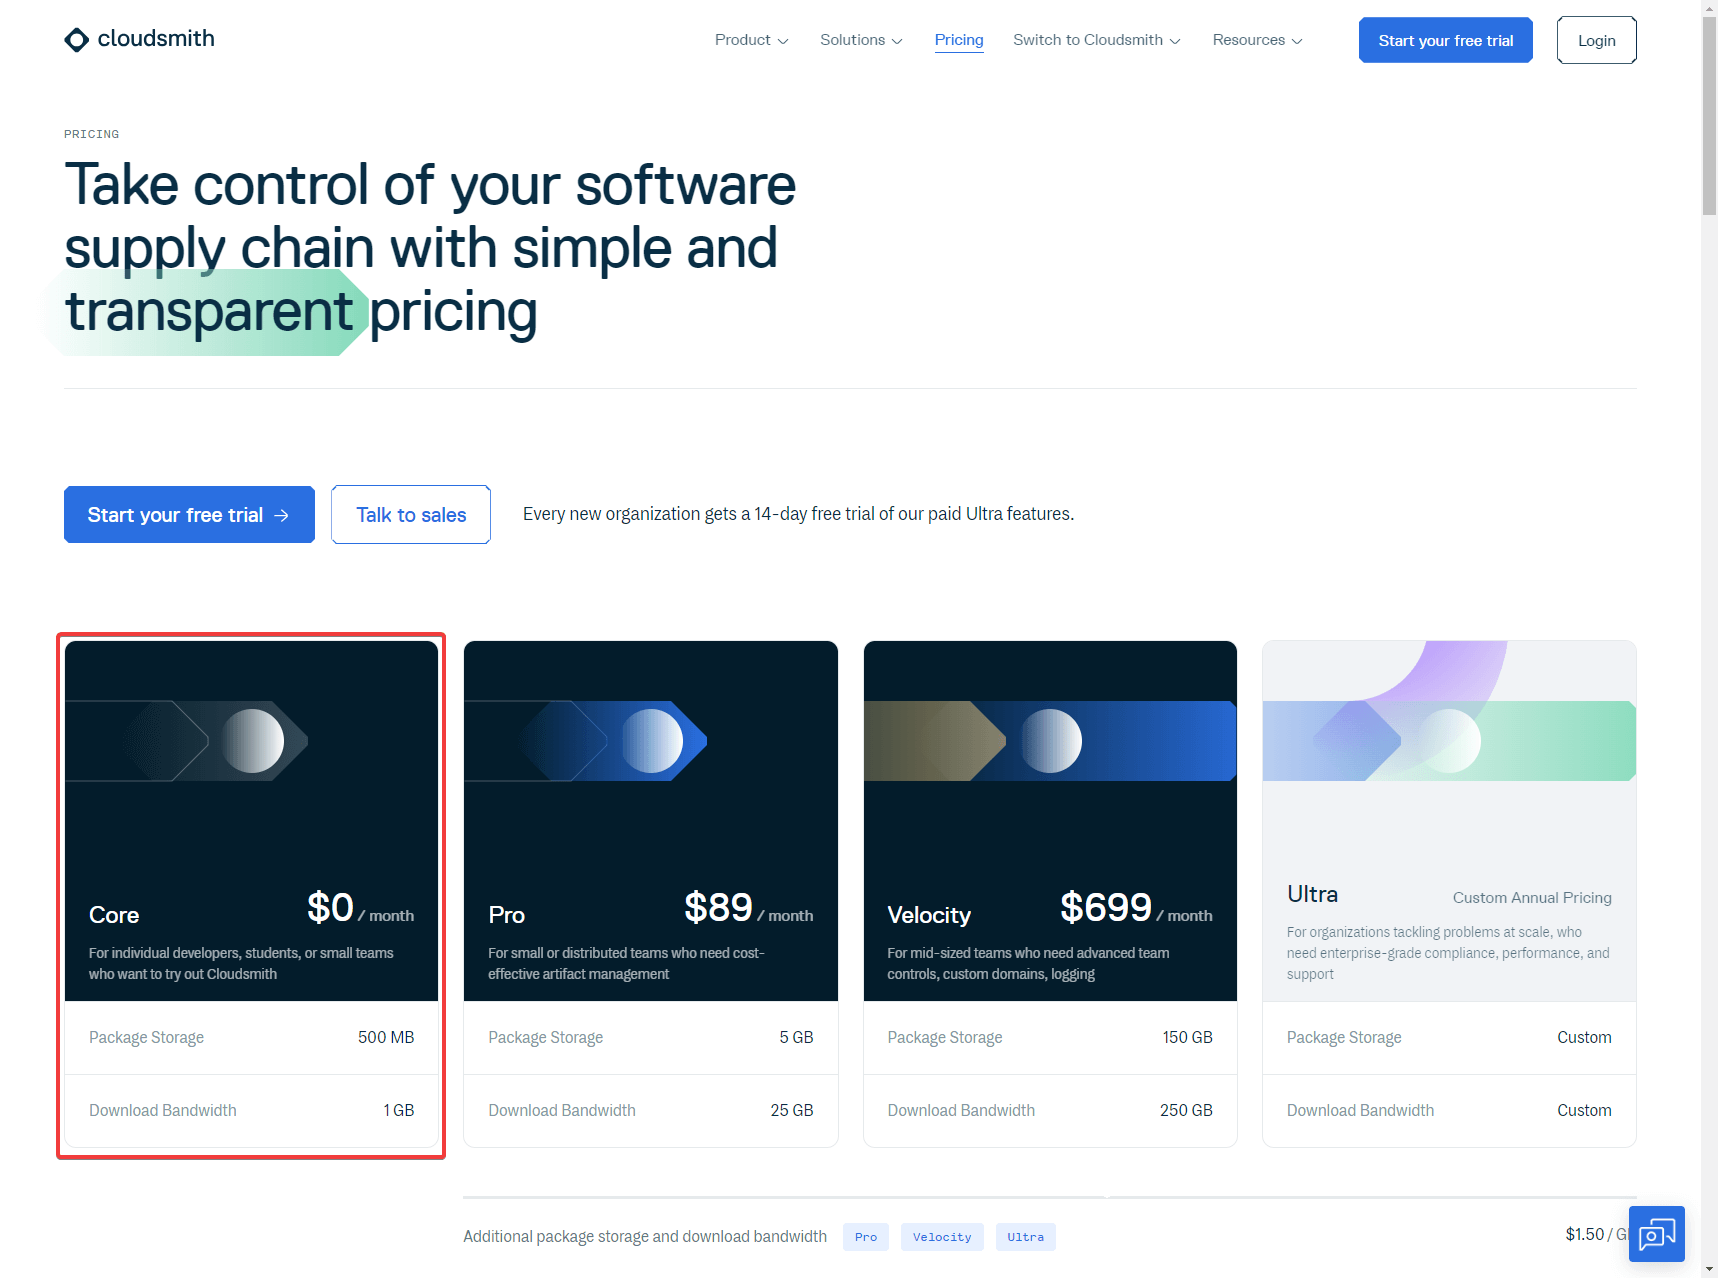
As you can see we get a 14-day free trial to their paid features. However, if you keep your usage to a minimum you can use their service for free.
Create a Repository
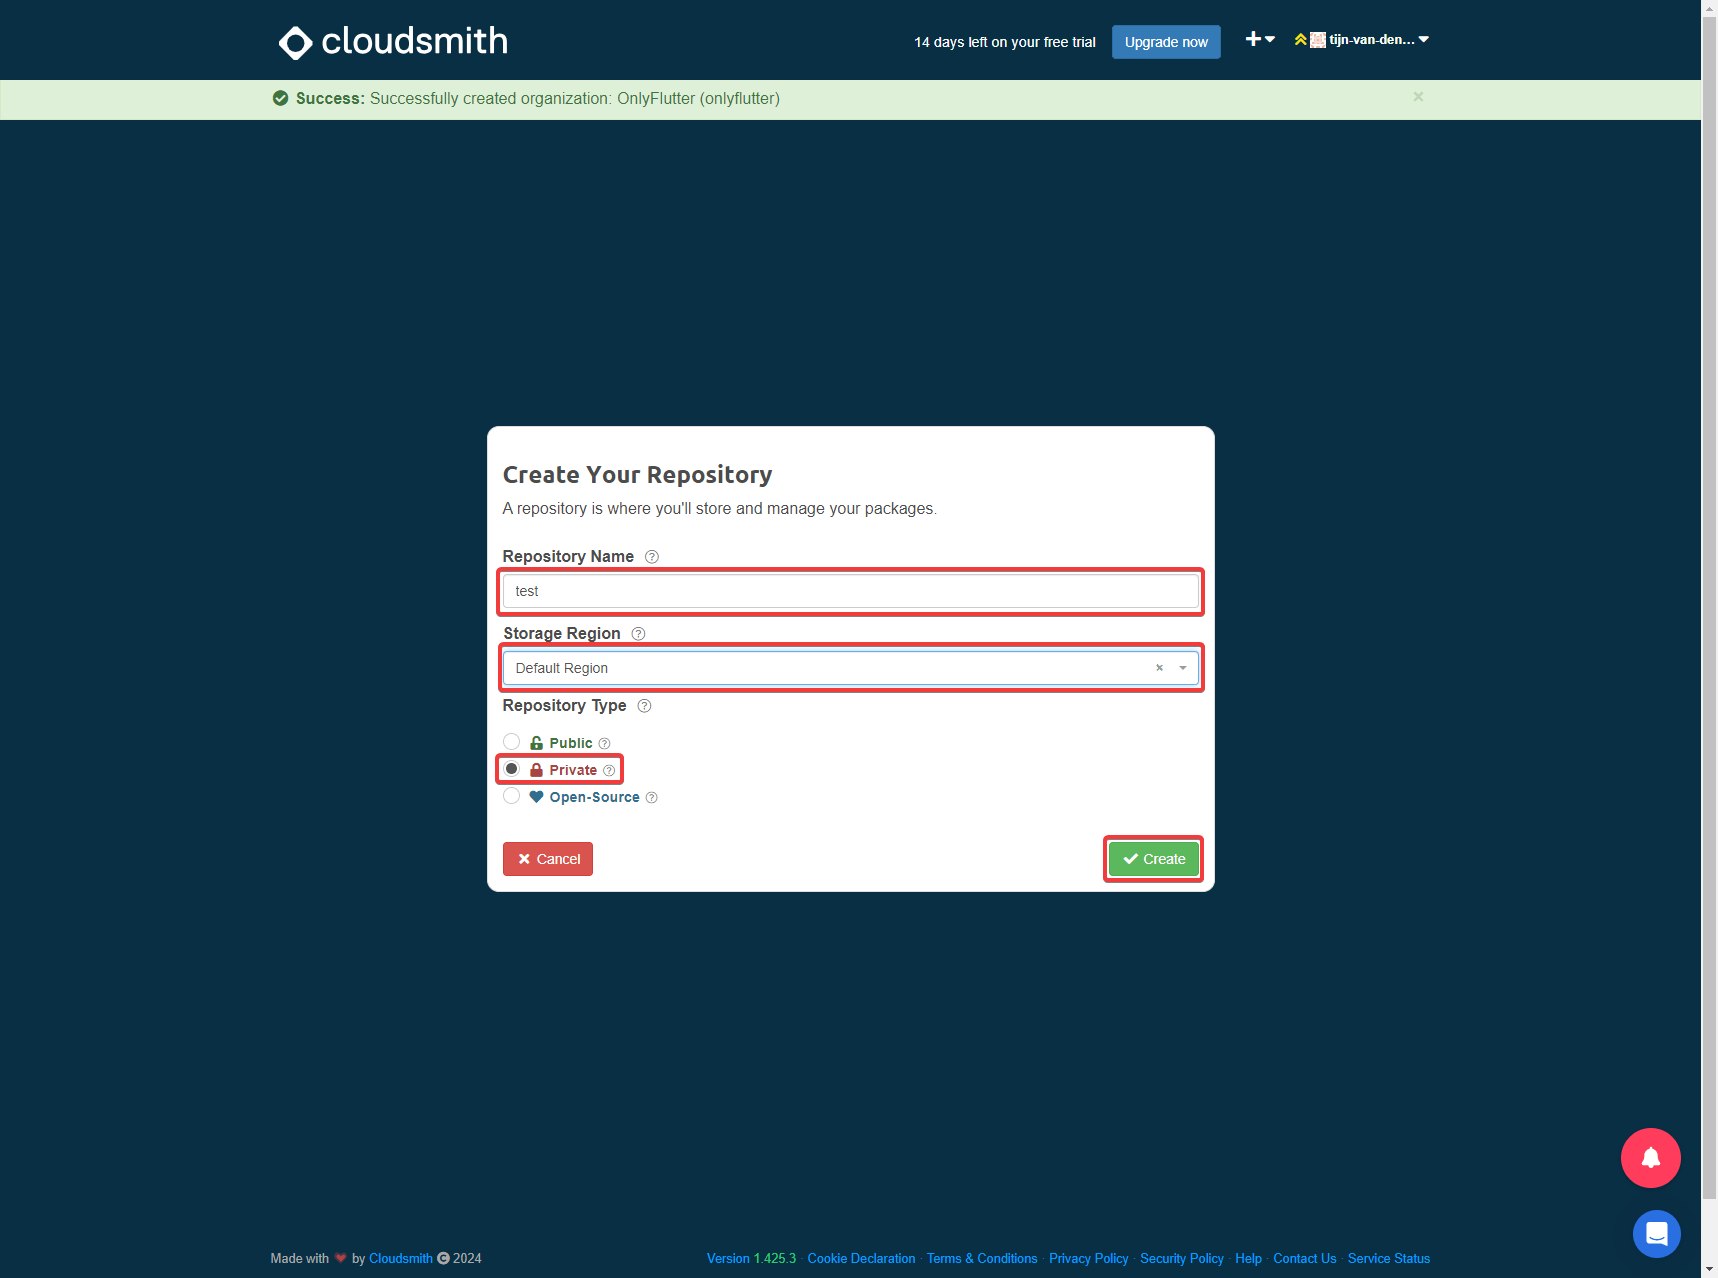
Now that we have created an organization the next step is to create a repository. Provide the Repository Name, select the Storage Region (select Default Region if you do not want to use paid features), and ensure you select Private.
Create a Private Flutter or Dart Package
With the repository created, we can continue to create our private package. Ensure that you create this package outside of your project because we want to publish the private Flutter or Dart package online.
To create a Flutter package, we can execute the following command, where test is the name of the package:
flutter create --template=package testIf you want to create a dart package instead you can execute this command, where test is the name of the package:
dart create -t package testIn this tutorial, we will be working with a Flutter package, but you can follow along with a Dart package as well.
Configure the Publish Destination for the Private Package
After creating our package, we need to specify the destination for publishing. First, we must find the URL endpoint provided by Cloudsmith. Generally, this URL endpoint follows the format: https://dart.cloudsmith.io/<organization>/<repository>/, where <organization> is your organization’s name and <repository> is your repository’s name, both in lowercase. To find the exact URL endpoint, follow the steps in the next section.
Find the Dart Endpoint for the Package
1. Click on Package Formats and select Dart.
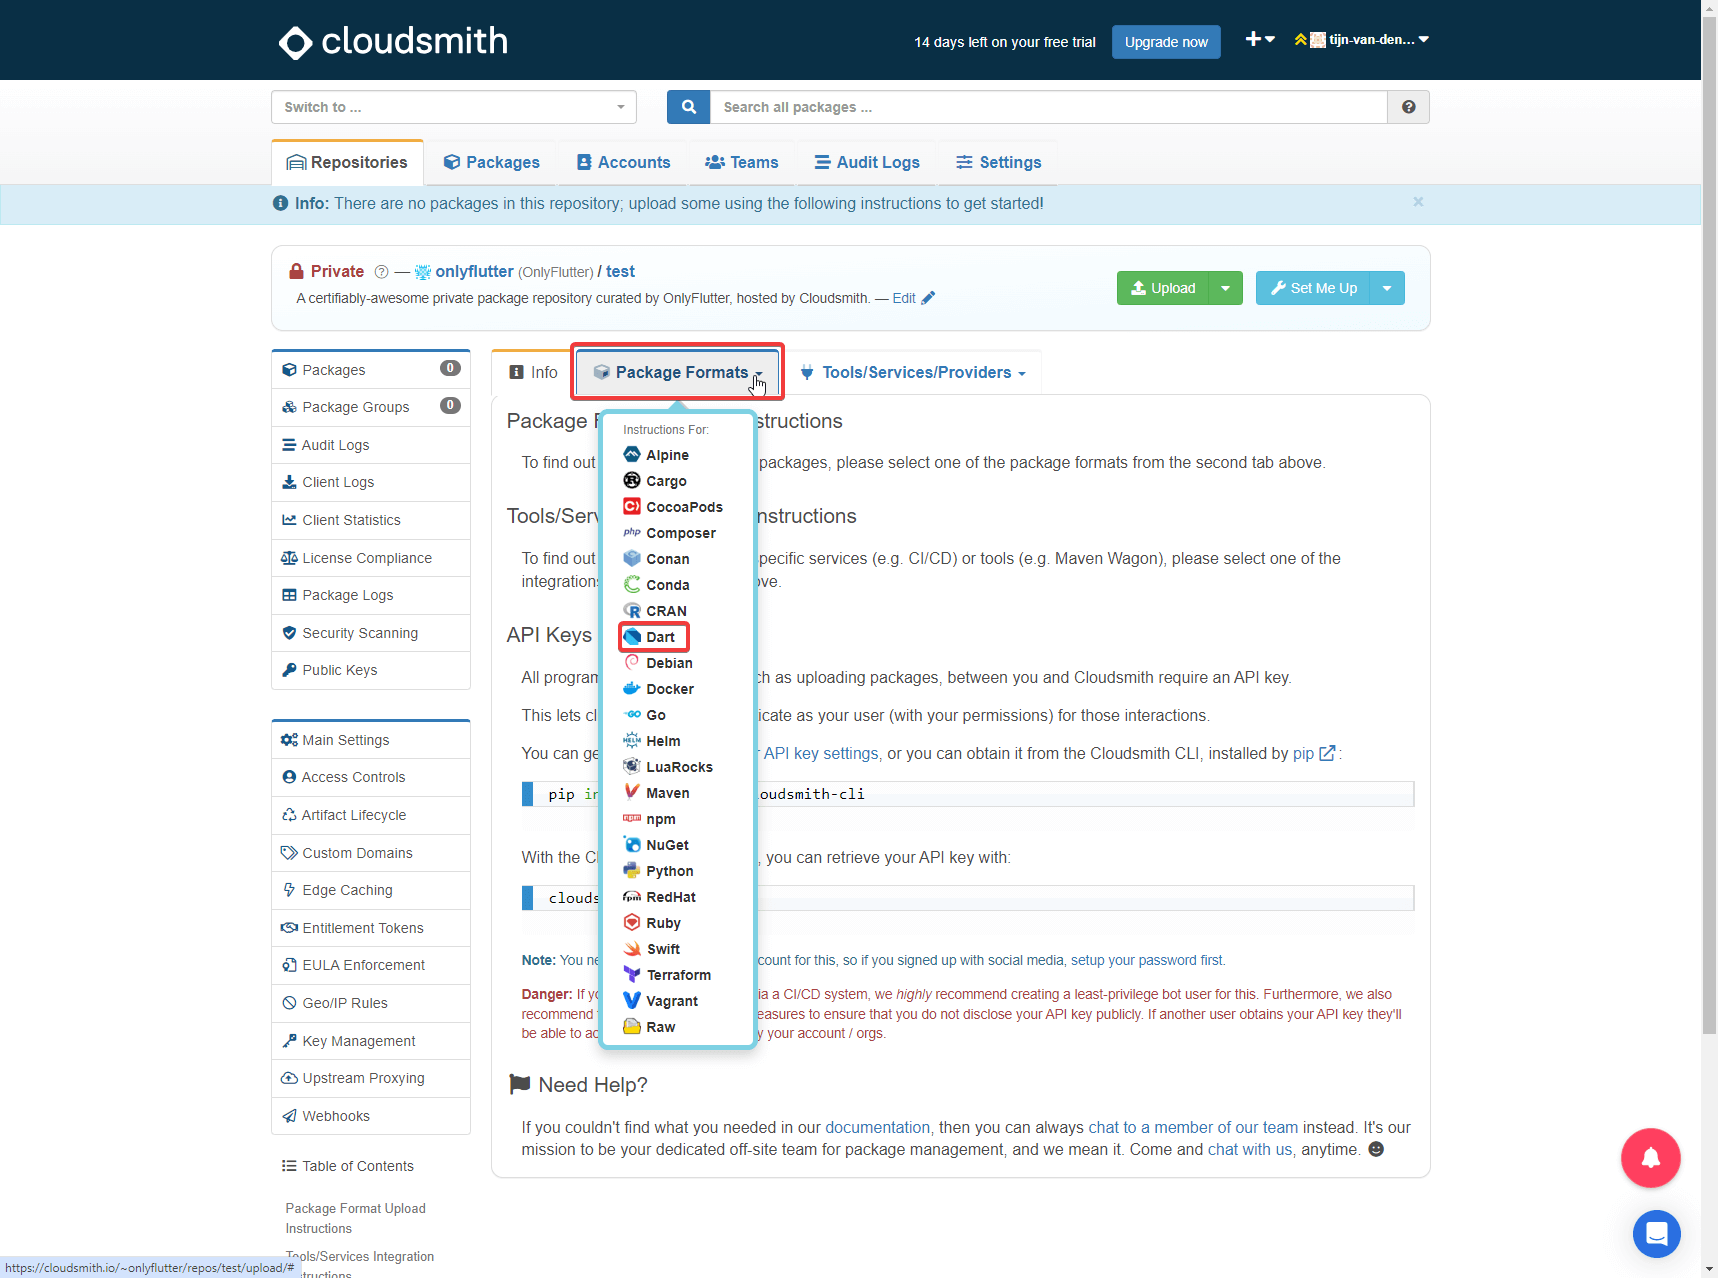
2. Afterward, click on Native CLI/API/Tools.
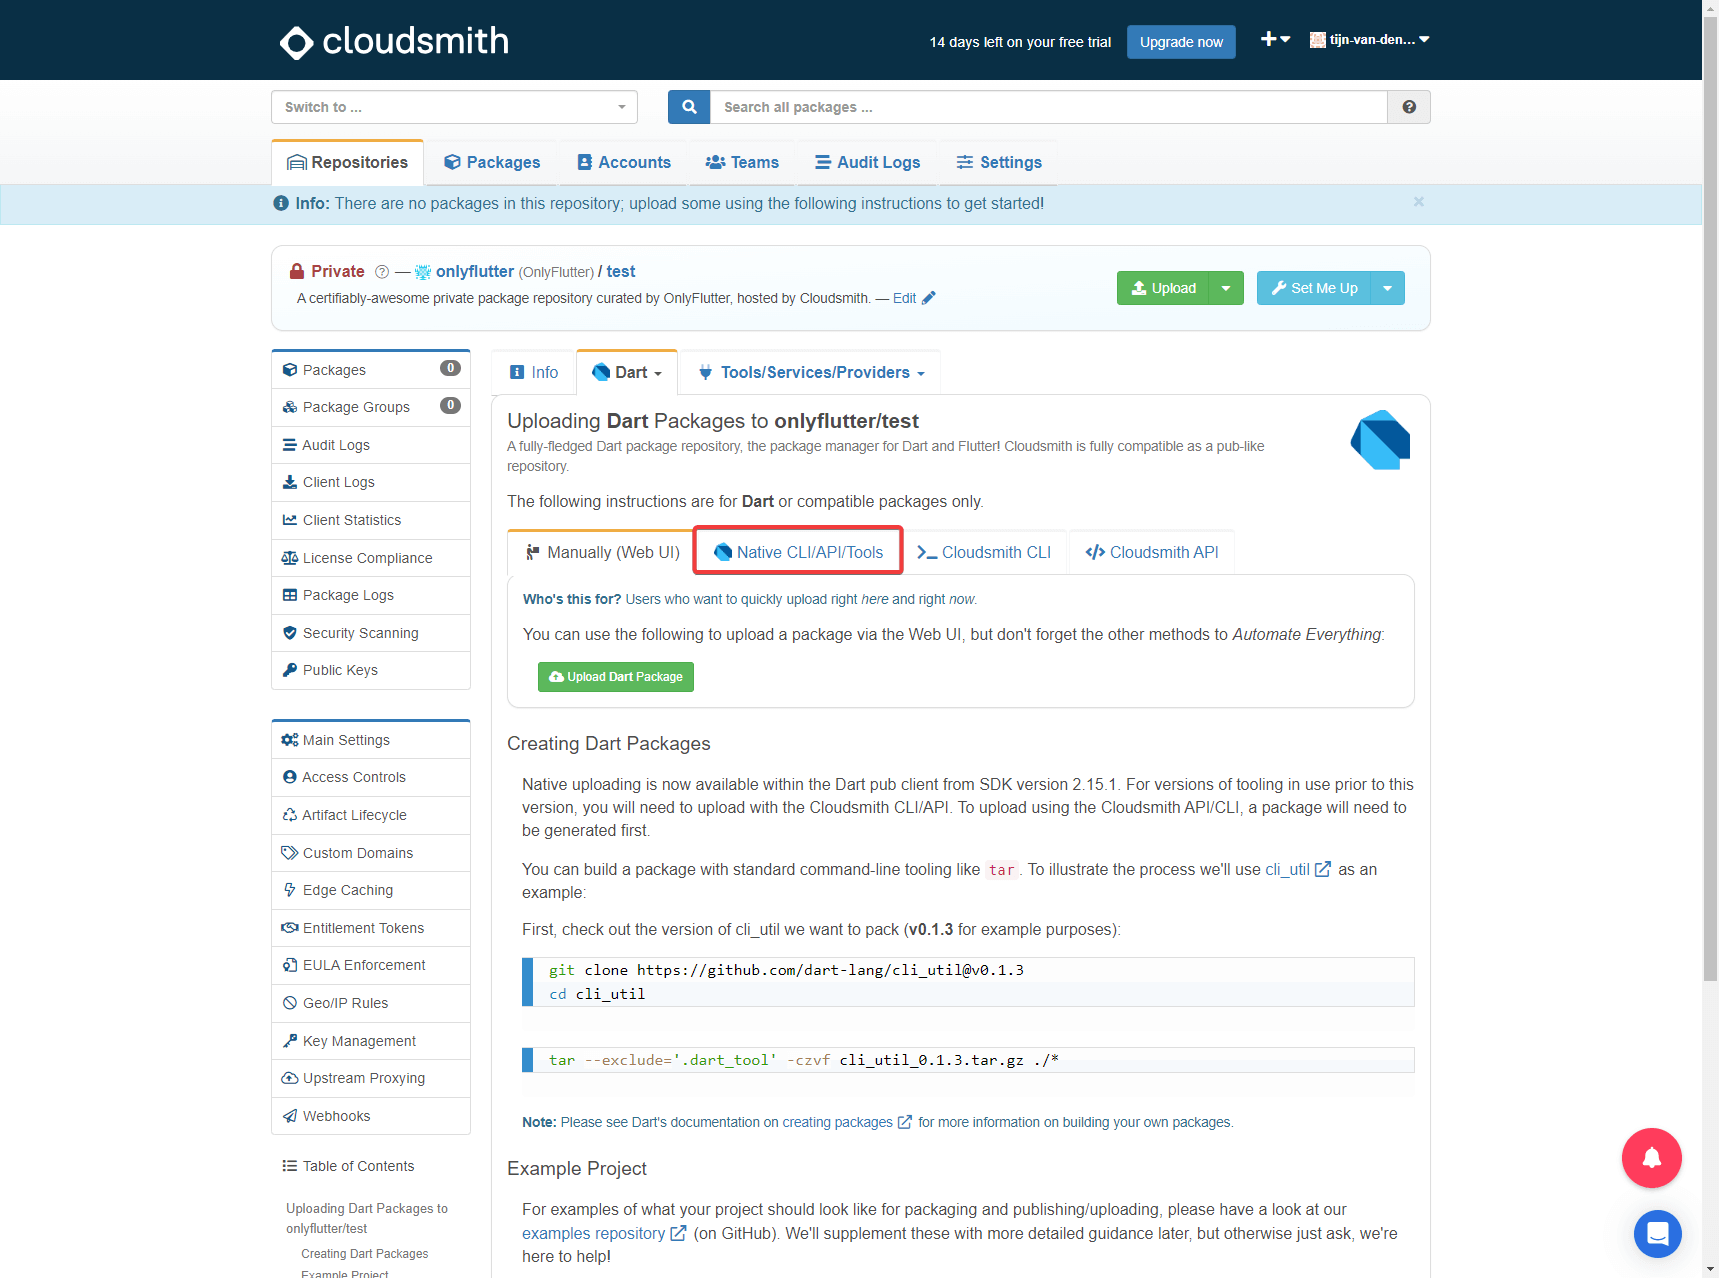
3. Now the URL you want to publish to should be visible.
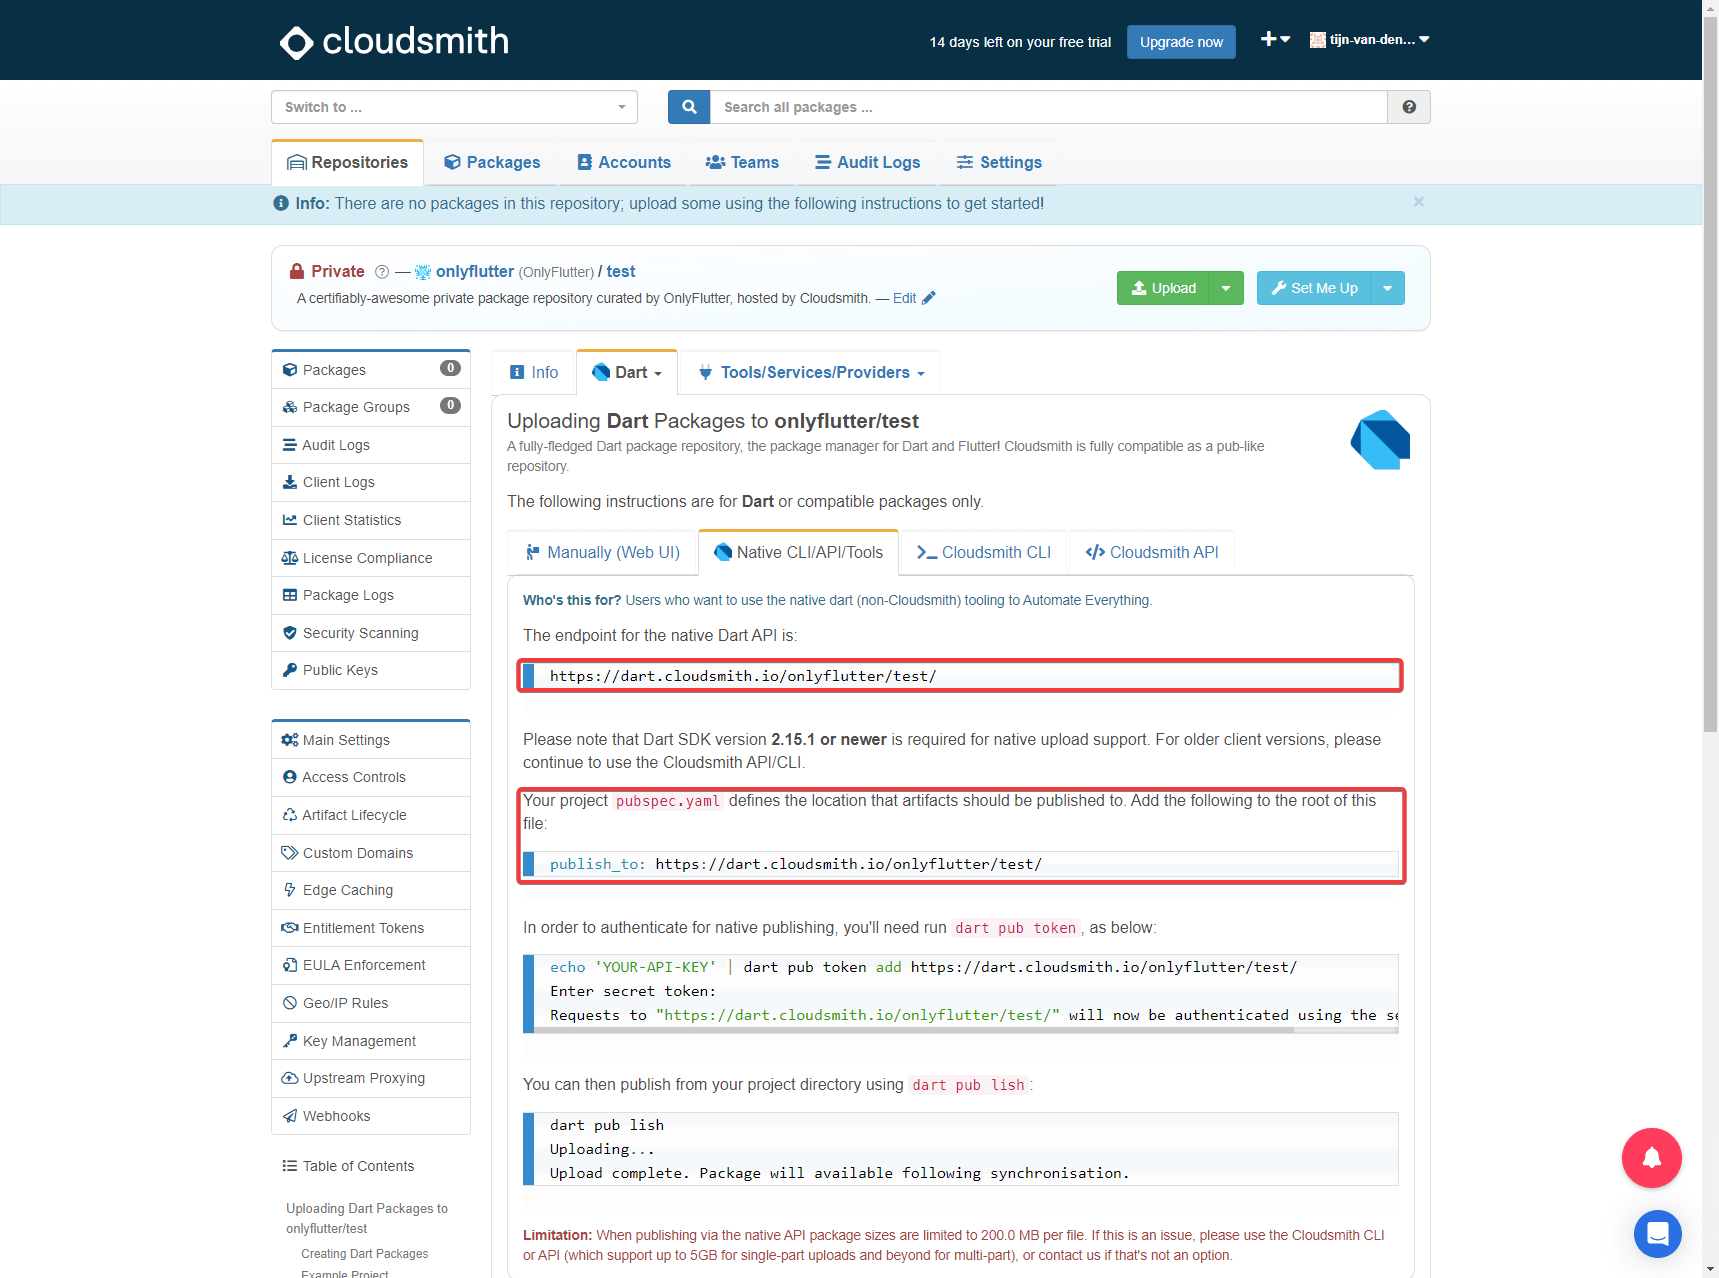
Add the Publish Destination to the Private Package
At last, we have to add the URL endpoint to our package’s pubspec.yaml file. Therefore, we can use the publish_to field which we can set to the provided URL endpoint.
name: test
description: "A new Flutter package project."
version: 0.0.1
publish_to: https://dart.cloudsmith.io/onlyflutter/test/
Ensure that you change the URL in the above example code to your own URL.
Authenticating for Native Publishing
After adding the publish destination to our private package we can authenticate our package for native publishing. To authenticate we need to execute the following command, do not forget to change the URL:
dart pub token add https://dart.cloudsmith.io/onlyflutter/test/Executing this command will prompt a message that will ask us to enter a secret token.

To get the secret token we have to navigate back to our Cloudsmith repository and click on your API key settings.
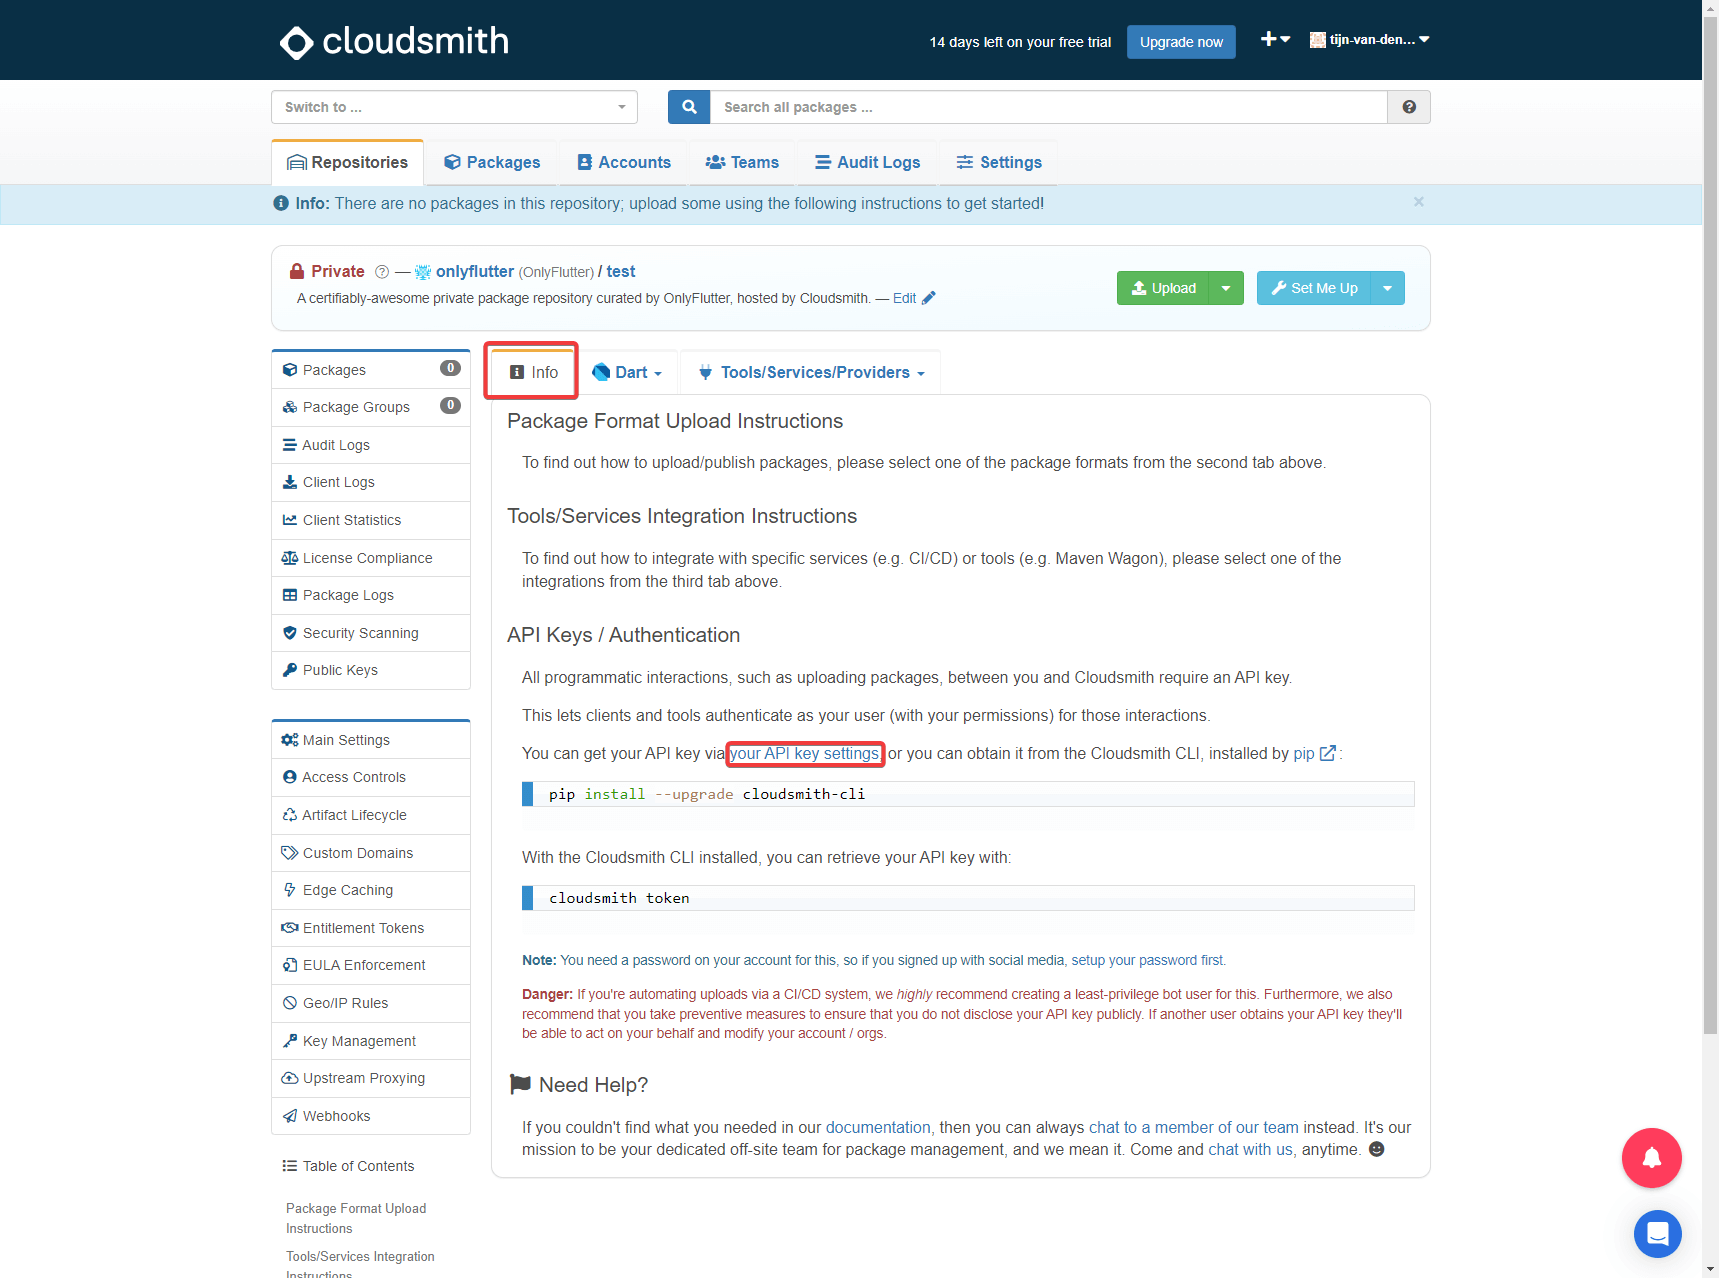
Afterward, you will see your API key.
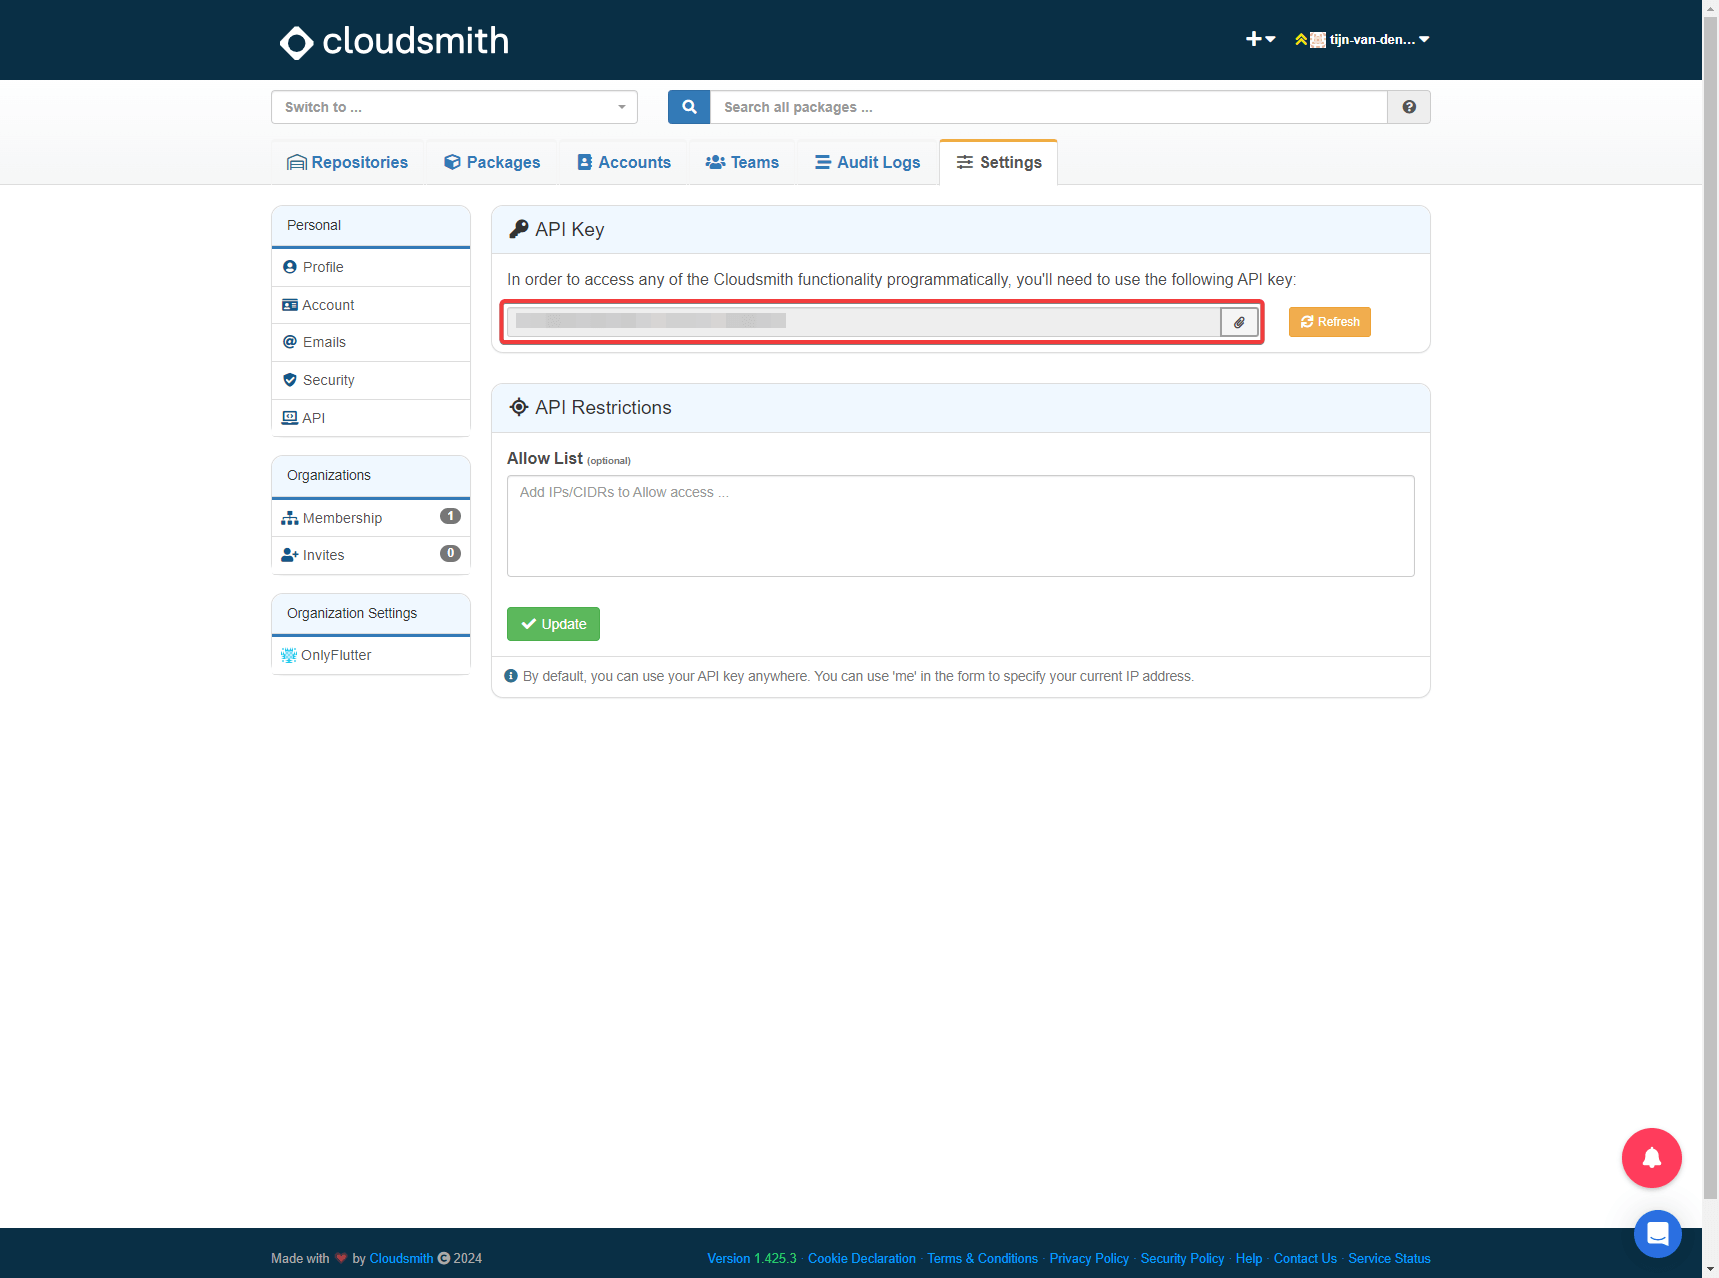
You can copy the API key and use it as the secret token.

Usually, terminals do not display sensitive data like passwords and tokens. Therefore, the screenshot might appear as if an empty value was provided.
Publishing the Private Flutter or Dart Package
Now that we have added the token we can finally publish our package by executing the following command inside our package:
dart pub publishAfter executing the command, you will be prompted to confirm that you want to publish your package. Type y and press Enter to confirm.
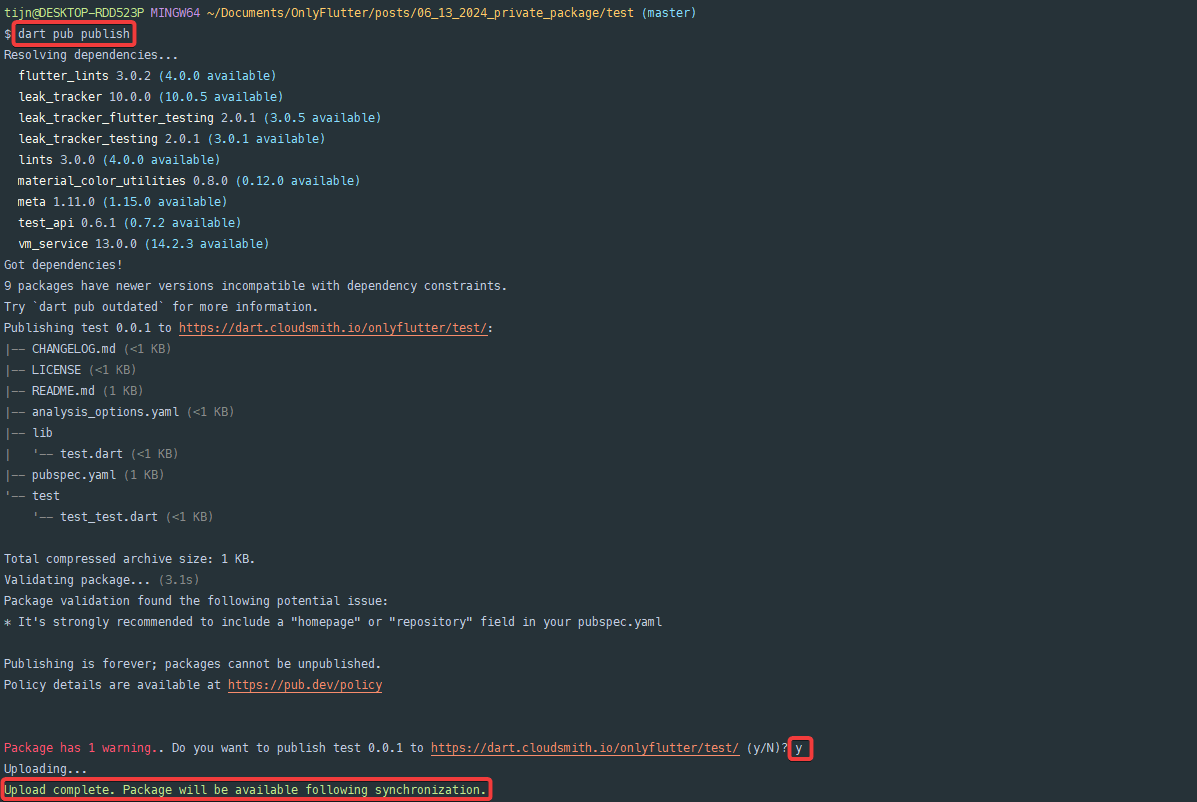
You can see at the bottom of the screenshot that the package has been successfully published.
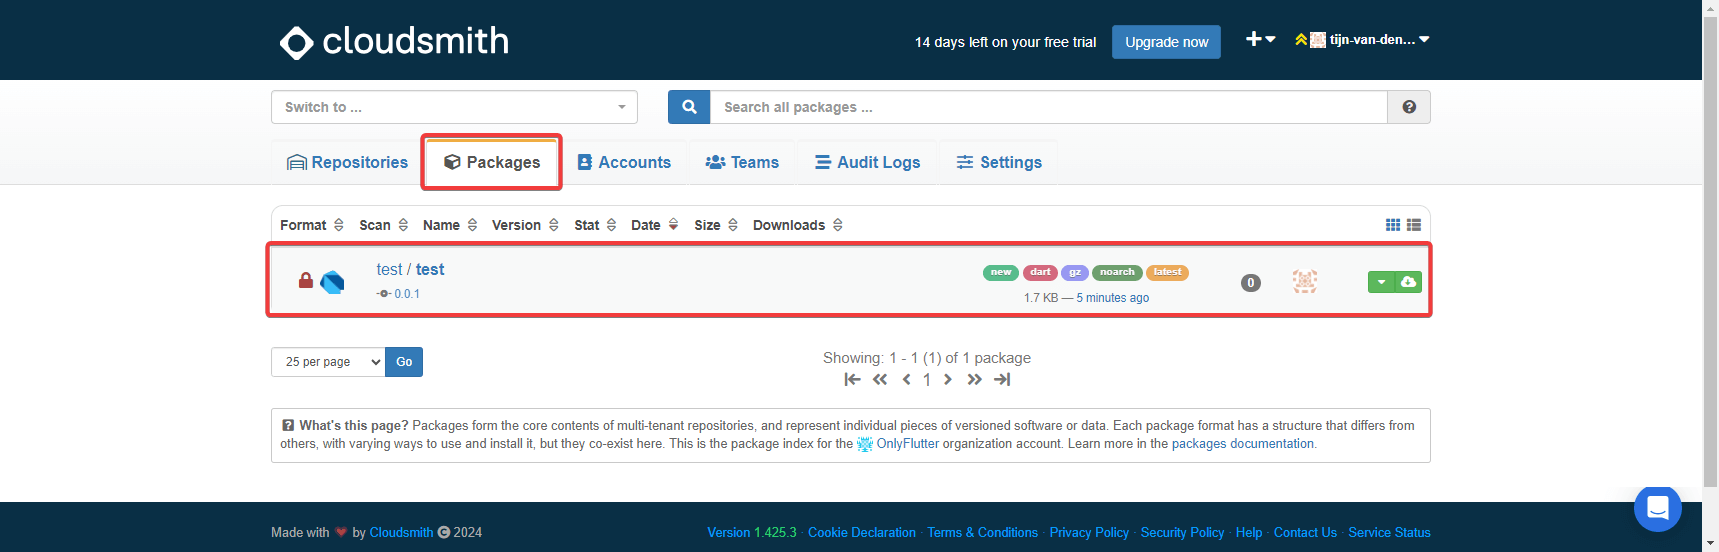
To ensure that the package is indeed published we can navigate to Cloudsmith and click on the Packages tab. You should see your package listed there.
Use the Private Package Inside Your Project
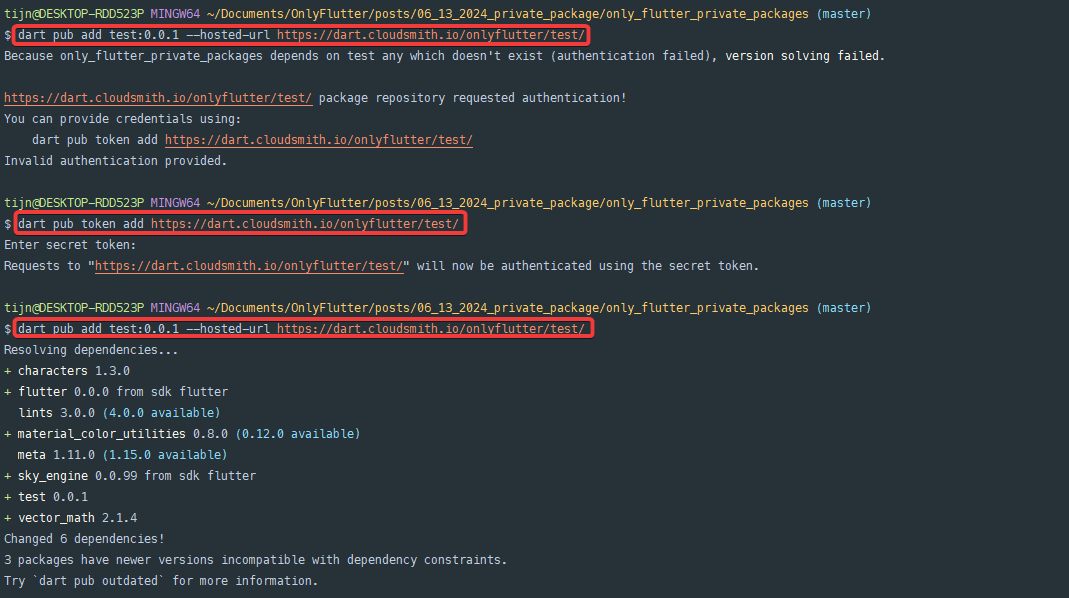
To use your private package inside any project you can execute the following command inside your project, do not forget to change the URL and version:
dart pub add test:0.0.1 --hosted-url https://dart.cloudsmith.io/onlyflutter/test/This command can be found by clicking on your private package as shown in the previous screenshot and clicking on Setup.

You can confirm that the package has been added by searching for the following entry inside your pubspec.yaml file.
dependencies:
  test:
    hosted: https://dart.cloudsmith.io/onlyflutter/test/
    version: 0.0.1
Security Improvements
Before moving on, we want to ensure that our package is properly secured. We can do this by trying to add the package to our project without being authenticated. Therefore, we need to remove the token from our environment. To remove the token we can execute the following command, do not forget to change the URL:
dart pub token remove https://dart.cloudsmith.io/onlyflutter/test/After removing the token, if we try to add the package to our project again by executing the below command, you will see that we are unable to do so:
dart pub add test:0.0.1 --hosted-url https://dart.cloudsmith.io/onlyflutter/test/The output will look like the following:

Using Entitlement Tokens
Now to get access to your package again, you can use the following command:
dart pub token add https://dart.cloudsmith.io/onlyflutter/test/Once again, you will be prompted to provide a secret token. However, this time we want to use an Entitlement Token. An Entitlement Token only has read access, therefore the user can fetch the package from Cloudsmith, but cannot publish it to Cloudsmith.
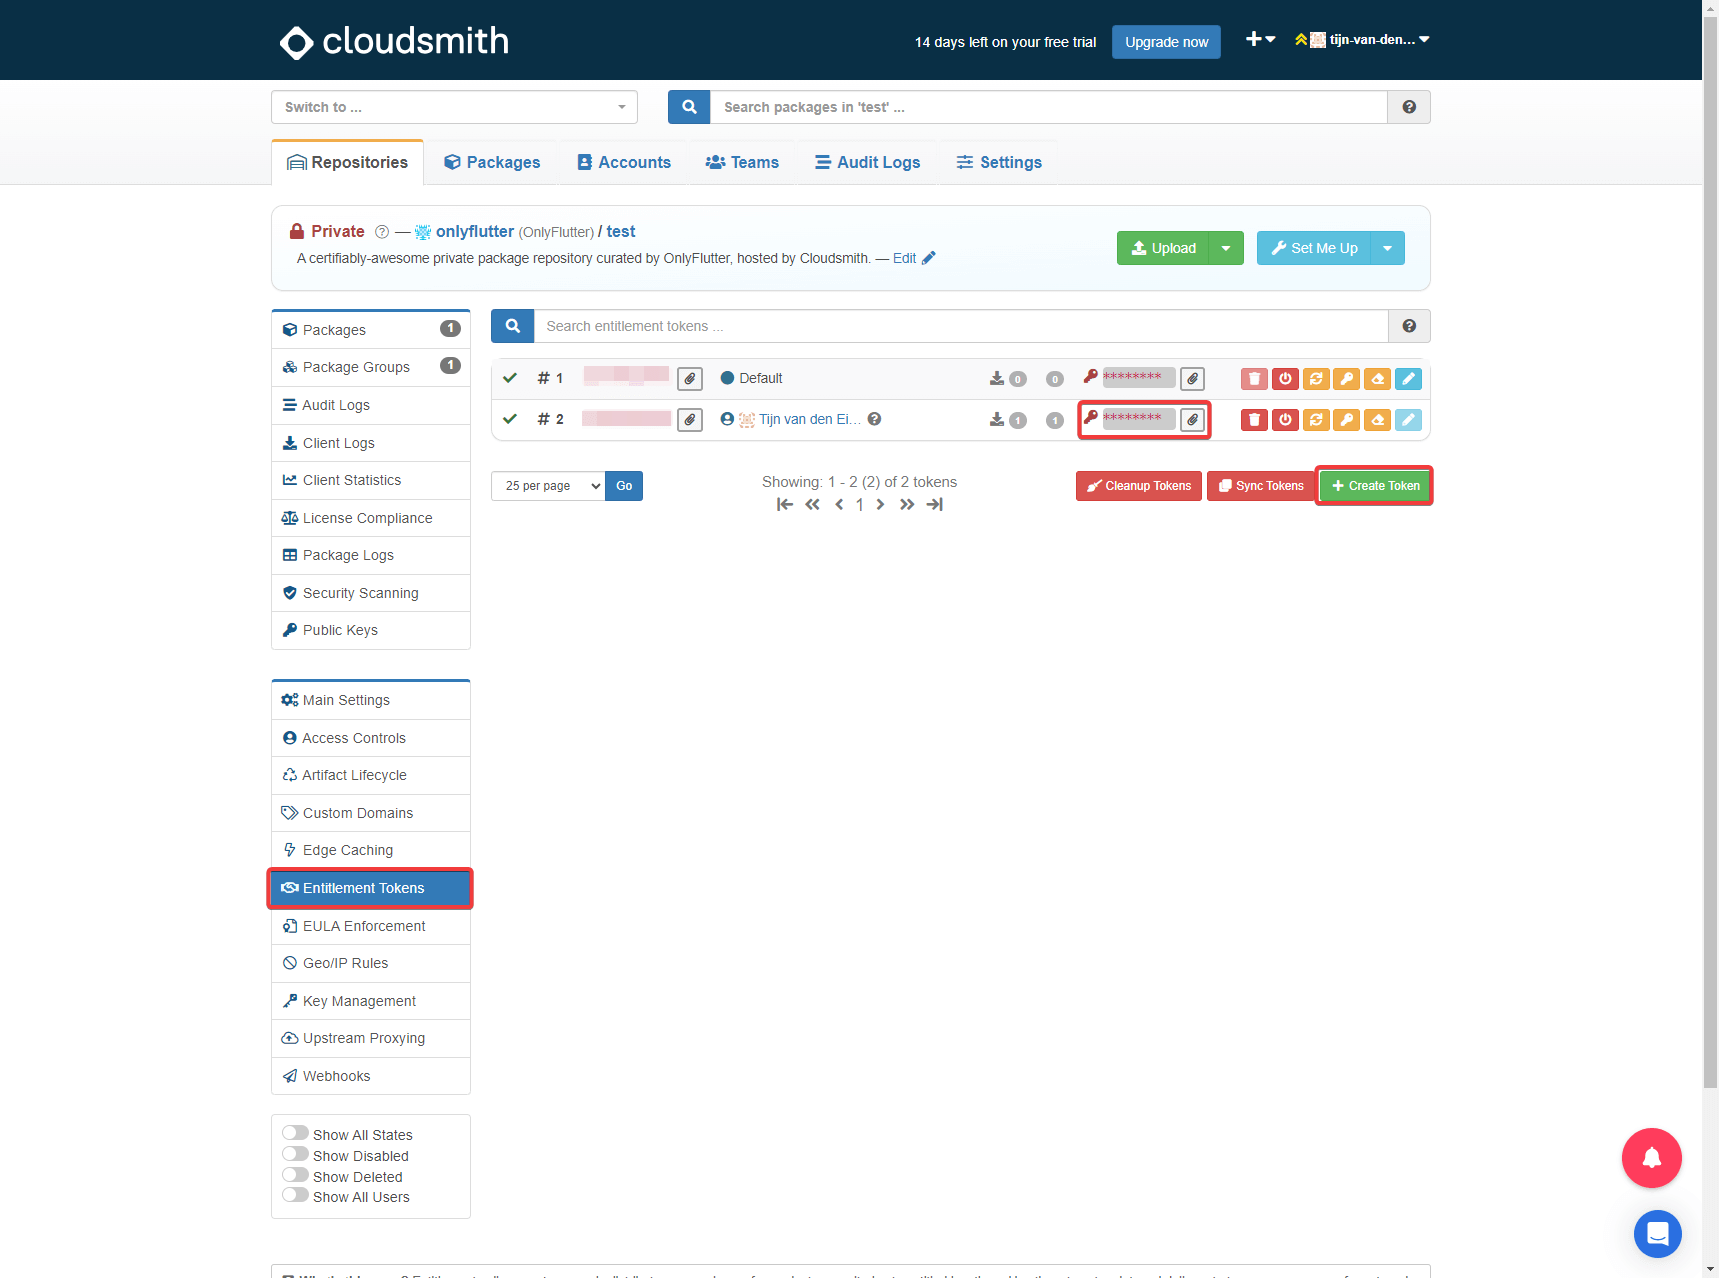
The Entitlement Token can be found by clicking on Entitlement Tokens on the left side of the Cloudsmith interface. Afterward, you will see the Default and your account’s Entitlement Token. You can also create a new Entitlement Token.
Now, when you provide an Entitlement Token as the secret token, you will be able to successfully add the package to your project.
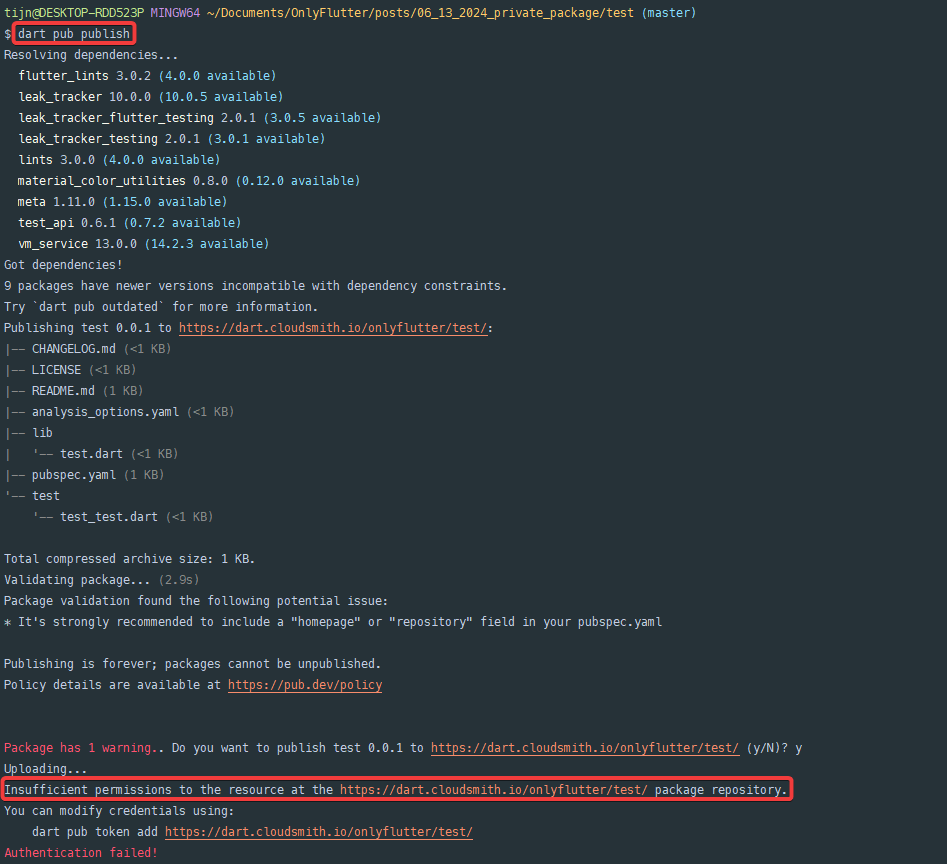
On the other hand, when you go back to your private repository and execute the publish command again, you will notice that you will no longer be able to publish the package.
dart pub publishAs mentioned before, this is because Entitlement Tokens are read-only.
You can revert these changes by removing the token again and adding the API key as your token.
Conclusion
In this tutorial, we discussed publishing private Flutter and Dart packages to Cloudsmith. With Cloudsmith’s native support for Dart, the implementation is relatively simple. You have learned how to configure Cloudsmith, publish private packages using the dart pub commands, and add private packages to your project. We also covered additional security measures to ensure that your package remains private.