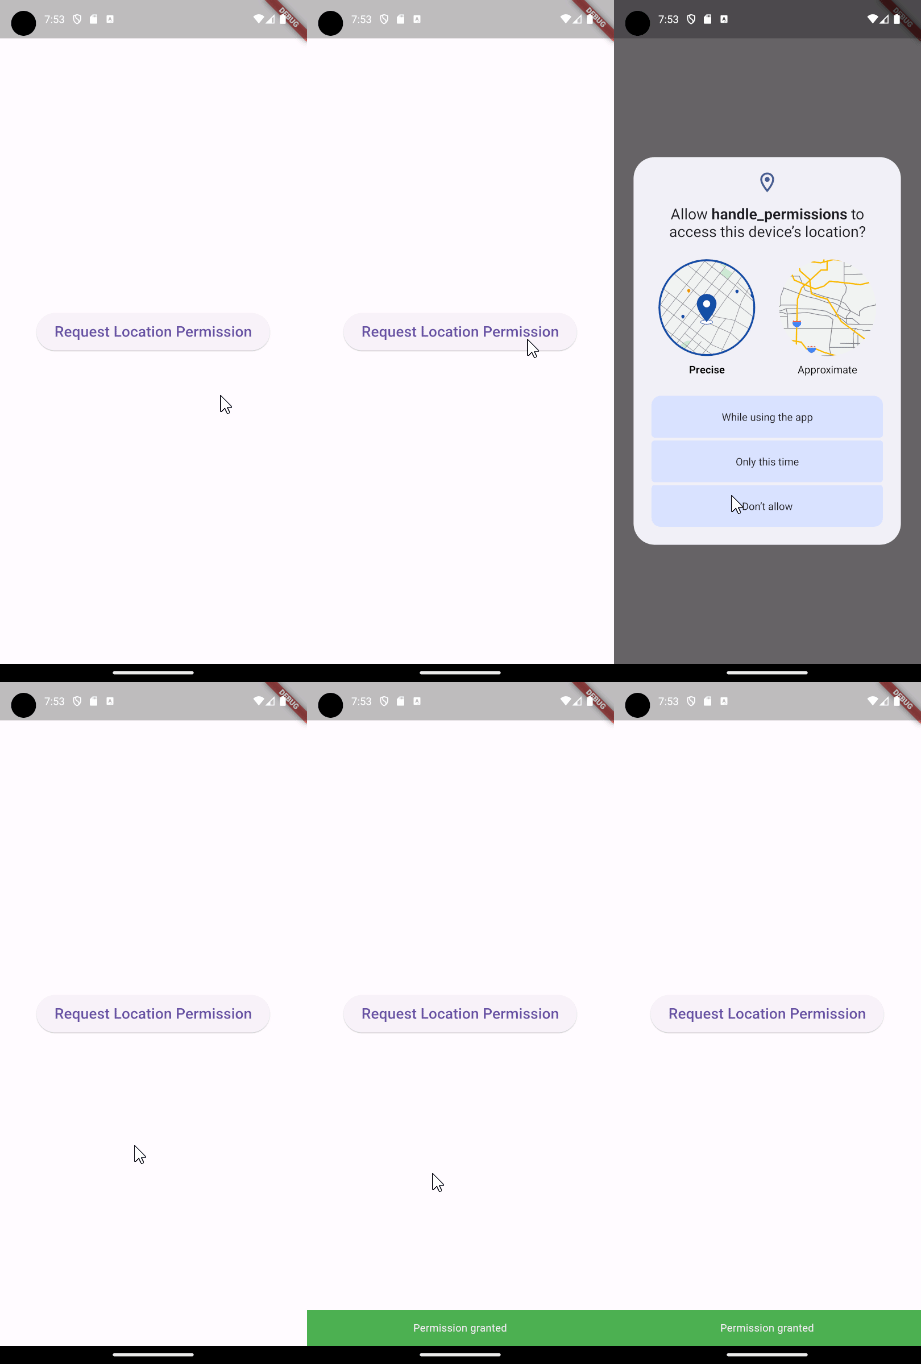
To use features like location, camera, or Bluetooth in your Flutter application, you need the user’s permission. Fortunately, handling permissions in Flutter is very easy. In this post, we will handle permissions for both Android and iOS.
Table of contents
Install the Permission Handler Package
To handle permissions in Flutter, we first need to install the Permission Handler package into our project. We can install the package by executing the following command inside our project:
flutter pub add permission_handlerOnce the command is executed, make sure to check your pubspec.yaml file for the added dependencies. You should see the Permission Handler package included in the dependencies section, like this:
dependencies:
  permission_handler: ^11.3.1
Android Configurations
To access any permission in Android we need to add an entry inside the app/src/main/AndroidManifest.xml for each permission our application needs. For example, to access the location, we need to add the following uses-permission entry.
<manifest xmlns:android="http://schemas.android.com/apk/res/android">
    <uses-permission android:name="android.permission.ACCESS_FINE_LOCATION" />
    <application
Ensure that you add the entry between the <manifest> and <application> tag. If you need multiple permissions you have to create separate uses-permission entries, like so:
<uses-permission android:name="android.permission.ACCESS_FINE_LOCATION" />
<uses-permission android:name="android.permission.CAMERA" />
You can find all the Android permissions here.
iOS Configurations
For accessing permissions in iOS we need to add entries inside the ios/Runner/info.plist file. For example, if we want to access the location we need to add the following entry:
<dict>
    <key>NSLocationAlwaysAndWhenInUseUsageDescription</key>
    <string>This application needs access to the location</string>
    ...
</dict>
Make sure the entries are placed within the <dict> tag. The text inside the <key> tag specifies the permission, while the text inside the <string> tag provides the description. You can modify the description as needed, since it will be shown to the user when requesting access.
For multiple entries, you need to add multiple keys with descriptions for each permission, as done below:
<key>NSLocationAlwaysAndWhenInUseUsageDescription</key>
<string>This application needs access to the location</string>
<key>NSCameraUsageDescription</key>
<string>This application needs access to camera</string>
You can find all the iOS permissions here.
Handling Location Permission in Flutter
To demonstrate how you can request permissions from the user, let us ask the user if we can access his location. See the code below:
import 'package:flutter/material.dart';
import 'package:permission_handler/permission_handler.dart';

void main() => runApp(const MyApp());

class MyApp extends StatelessWidget {
  const MyApp({super.key});

  @override
  Widget build(BuildContext context) {
    return const MaterialApp(
      home: HomePage(),
    );
  }
}

class HomePage extends StatelessWidget {
  const HomePage({super.key});

  void _requestLocationPermission(BuildContext context) async {
    await Permission.location.request().then((PermissionStatus status) {
      switch (status) {
        case PermissionStatus.granted:
          _showSnackBar(context, 'Permission granted', Colors.green);
        case PermissionStatus.denied:
          _showSnackBar(context, 'Permission denied', Colors.amber);
        case PermissionStatus.permanentlyDenied:
          _showSnackBar(context, 'Permanently denied', Colors.redAccent);
        default:
          _showSnackBar(context, 'Something went wrong', Colors.red);
      }
    });
  }

  void _showSnackBar(BuildContext context, String text, Color color) {
    ScaffoldMessenger.of(context).showSnackBar(SnackBar(
      content: Text(text, textAlign: TextAlign.center),
      backgroundColor: color,
    ));
  }

  @override
  Widget build(BuildContext context) {
    return Scaffold(
      body: Center(
        child: ElevatedButton(
          style: ElevatedButton.styleFrom(minimumSize: const Size(200, 50)),
          onPressed: () => _requestLocationPermission(context),
          child: const Text(
            'Request Location Permission',
            style: TextStyle(fontSize: 20),
          ),
        ),
      ),
    );
  }
}
In this code snippet, we create a HomePage widget that shows a button that will call the _requestLocationPermission function when pressed. The _requestLocationPermission function will start by calling the request() function on the location permission.
We await this function call, and once it is finished, it will return a PermissionStatus. Based on the permission status, the application shows a SnackBar message at the bottom of the screen using the _showSnackBar function. For example, if the location permission is granted, a green SnackBar message will be shown.

Opening the Application Settings From the Application
To improve our application’s functionality, we can use the package’s openAppSettings function, which allows users to access the application’s permissions settings directly.
This way, if the user denies permission or accidentally misclicks, they will be redirected to the application’s settings. This allows them to change the permissions.
void _requestLocationPermission(BuildContext context) async {
  await Permission.location.request().then((PermissionStatus status) {
    switch (status) {
      case PermissionStatus.granted:
        _showSnackBar(context, 'Permission granted', Colors.green);
      case PermissionStatus.denied:
        openAppSettings();
      case PermissionStatus.permanentlyDenied:
        openAppSettings();
      default:
        _showSnackBar(context, 'Something went wrong', Colors.red);
    }
  });
}
In the updated _requestLocationPermission function, we have modified the denied cases to call the openAppSettings function. Now, when the user denies permission, the application will automatically open the application’s settings, giving the user the option to adjust their permission preferences.

Handling Multiple Permissions at Once
So far we have discussed how to handle a single permission. However, the package can also be used to handle multiple permissions at once.
import 'package:flutter/material.dart';
import 'package:permission_handler/permission_handler.dart';

void main() => runApp(const MyApp());

class MyApp extends StatelessWidget {
  const MyApp({super.key});

  @override
  Widget build(BuildContext context) {
    return const MaterialApp(
      home: HomePage(),
    );
  }
}

class HomePage extends StatelessWidget {
  const HomePage({super.key});

  void _requestPermissions(BuildContext context) async {
    await [Permission.location, Permission.camera].request().then((Map<Permission, PermissionStatus> statuses) {
      if (statuses.values.contains(PermissionStatus.denied)) {
        openAppSettings();
        return;
      }

      if (statuses.values.contains(PermissionStatus.permanentlyDenied)) {
        openAppSettings();
        return;
      }

      if (statuses.values.contains(PermissionStatus.granted)) {
        _showSnackBar(context, 'Permissions granted', Colors.green);
        return;
      }

      _showSnackBar(context, 'Something went wrong', Colors.red);
    });
  }

  void _showSnackBar(BuildContext context, String text, Color color) {
    ScaffoldMessenger.of(context).showSnackBar(SnackBar(
      content: Text(text, textAlign: TextAlign.center),
      backgroundColor: color,
    ));
  }

  @override
  Widget build(BuildContext context) {
    return Scaffold(
      body: Center(
        child: ElevatedButton(
          style: ElevatedButton.styleFrom(minimumSize: const Size(200, 50)),
          onPressed: () => _requestPermissions(context),
          child: const Text(
            'Request Permissions',
            style: TextStyle(fontSize: 20),
          ),
        ),
      ),
    );
  }
}
In the above code, we changed the name of the _requestLocationPermission function to _requestPermissions because it will now be requesting multiple permissions.
To request multiple permissions we can call the request function on a list of permissions. In this case, we use the location and camera permission. Inside our then clause we will now receive a map with the permissions and their statuses.
To simplify the function we will check if the statuses contains either denied, permanentlyDenied or granted. Based on the outcome we either show a Snackbar message or open the application’s settings.

Conclusion
In this post, you have learned how to handle permissions in Flutter using the Permission Handler package. We started by installing the package and configuring permissions for both Android and iOS. Afterward, we handled a single permission, opened the application’s settings and handled multiple permissions at once.


