To create a dynamic layout knowing the height and padding of the AppBar widget in Flutter can be very valuable. By subtracting the height of the AppBar and its padding from the total screen height, we can figure out the remaining space for our layout. In this post, we will go over the possible ways to find the height and padding of the AppBar widget in Flutter.
Table of contents
Get the Height of the AppBar
To find the height of the AppBar in Flutter, there are two simple methods we can use. It is also good to know that as of now the default value for the AppBar widget is 56.0. However, I highly encourage you always to retrieve the height dynamically. This will ensure that whenever the value of 56.0 will change your layout will still function properly.
1. Using kToolBarHeight Constant
The first approach is to get the height by using the kToolBarHeight constant, as done in the code below.
import 'package:flutter/material.dart';

void main() => runApp(const MyApp());

class MyApp extends StatelessWidget {
  const MyApp({super.key});

  @override
  Widget build(BuildContext context) {
    return MaterialApp(
      home: Scaffold(
        appBar: AppBar(
          backgroundColor: Colors.blueAccent,
          title: const Center(
            child: Text(
              'kToolbarHeight: $kToolbarHeight',
              style: TextStyle(color: Colors.white),
            ),
          ),
        ),
        body: const SizedBox(),
      ),
    );
  }
}
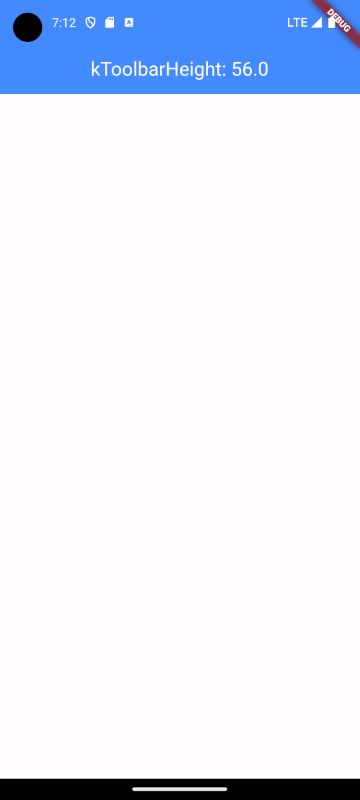
In this code snippet, we display a Scaffold widget with an AppBar. In the AppBar we have a Text widget that shows the height of the AppBar by using the kToolBarHeight constant.
As you can see the value is 56.0.

2. Using the AppBar Widget
Secondly, we can directly assess the height of the AppBar from the widget itself. By accessing the prefferedSize property of the AppBar, see the code below.
import 'package:flutter/material.dart';

void main() => runApp(const MyApp());

class MyApp extends StatelessWidget {
  const MyApp({super.key});

  @override
  Widget build(BuildContext context) {
    return MaterialApp(
      home: Scaffold(
        appBar: AppBar(
          backgroundColor: Colors.blueAccent,
          title: Center(
            child: Text(
              'preferredSize: ${AppBar().preferredSize.height}',
              style: const TextStyle(color: Colors.white),
            ),
          ),
        ),
        body: const SizedBox(),
      ),
    );
  }
}
In this code snippet, instead of using the kToolBarHeight, we used the preferredSize property of the AppBar widget to get the height of the AppBar.
As you can see the value is also 56.0.

Get the Top Padding of the AppBar
As you might have noticed the AppBar widget, also has padding applied on top. Like getting the height of the AppBar, retrieving the top padding is also very simple.
Use MediaQuery.of(context).padding
We can retrieve the top padding by using the MediaQuery class, see the code below.
import 'package:flutter/material.dart';

void main() => runApp(const MyApp());

class MyApp extends StatelessWidget {
  const MyApp({super.key});

  @override
  Widget build(BuildContext context) {
    return MaterialApp(
      home: Scaffold(
        appBar: AppBar(
          backgroundColor: Colors.blueAccent,
          title: Center(
            child: Text(
              'top padding: ${MediaQuery.of(context).padding.top}',
              style: const TextStyle(color: Colors.white),
            ),
          ),
        ),
        body: const SizedBox(),
      ),
    );
  }
}
In this code snippet, we create a MediaQuery instance by using its of function. The of function requires a BuildContext so that we can retrieve the nearest MediaQuery. On the MediaQuery instance, we look at the padding property and focus on the top value.
The top value tells us how much padding there is at the top of the screen.

Improve Performance by Using paddingOf(context)
We can improve the performance of the above solution by using the MediaQuery.paddingOf(context).top function instead. See the example below.
import 'package:flutter/material.dart';

void main() => runApp(const MyApp());

class MyApp extends StatelessWidget {
  const MyApp({super.key});

  @override
  Widget build(BuildContext context) {
    return MaterialApp(
      home: Scaffold(
        appBar: AppBar(
          backgroundColor: Colors.blueAccent,
          title: Center(
            child: Text(
              'top padding: ${MediaQuery.paddingOf(context).top}',
              style: const TextStyle(color: Colors.white),
            ),
          ),
        ),
        body: const SizedBox(),
      ),
    );
  }
}
In this example, we use MediaQuery.paddingOf(context) instead of MediaQuery.of(context).padding. This approach ensures that the context is rebuilt only when the padding attribute changes, not when any attribute changes. As a result, the function triggers a rebuild only when the AppBar widget’s padding changes, making the build process more efficient.
Using MediaQuery.of(context).padding would cause a rebuild whenever any MediaQuery value changes, potentially leading to unnecessary rebuilds and increased build times.
Get the Device’s Screen Size
Now that we know how to get the height and padding of the AppBar widget, we can also take a look at how to get the height and width of the entire screen in Flutter. For detailed instructions on how to get the screen size in Flutter, please refer to the following article: How to Get the Screen Size in Flutter.
Conclusion
To make your Flutter applications more responsive, it is important to know how to find the height and padding of the AppBar widget. By subtracting the AppBar’s height and top padding from the total screen height, you can determine the available space for your layout.


First: don’t use MediaQuery.of(context).padding. Use the preferred MediaQuery.paddingOf(context).
Second, just use LayoutBuilder! It calculates “remaining space” efficiently, which is the number you’re looking for.
First: Yes, you are correct this is mentioned in the article as well. However, it is good to know both approaches.
Second: The LayoutBuilder is a great option as well, but it can be confusing, so I want to create a separate article for it and leave a reference in this article.