When your Flutter application is dealing with images that are fetched from the network, you can increase the performance by caching network images. This will ensure that the images do not have to be reloaded every time they are shown. Instead, they are temporarily saved on the user’s device.
Table of contents
Display a Regular Network Image
Before we start caching our network images, let us create a simple application that will display a network image.
import 'package:flutter/material.dart';

void main() => runApp(const MyApp());

class MyApp extends StatelessWidget {
  const MyApp({super.key});

  @override
  Widget build(BuildContext context) {
    return MaterialApp(
      home: Scaffold(
        body: Center(
          child: Image.network('https://picsum.photos/id/525/350/250'),
        ),
      ),
    );
  }
}
In the above code snippet, we create a simple MyApp widget that shows a centered network image using the Image.network constructor. This constructor takes the URL of the image and returns an Image widget.
The URL (https://picsum.photos/id/525/350/250) we are providing is from the picsum.photos website. This website is a placeholder image generator that provides random images with various dimensions. By specifying the id 525, we retrieve a specific image with a width of 350 pixels and a height of 250 pixels.

Now that we can display a regular network image, let us cache the same image.
Cache Network Images in Flutter
To cache network images in Flutter, we can best use the Cached Network Image package. This popular package uses the Flutter Cache Manager to store and retrieve images.
Install the Cached Network Image Package
First, we need to add the Cached Network Image package to our Flutter project. Execute the following command to install the package:
flutter pub add cached_network_imageAfter executing the command, let us make sure that we have the package. Open the pubspec.yaml file to check if you see the cached_network_image underneath the dependencies section:
dependencies:
  cached_network_image: ^3.3.1
Implement the Cached Network Image
Now that we have the package installed let us continue using the CachedNetworkImage widget to load and cache network images. We can do this by replacing the existing Image.network constructor with the CachedNetworkImage widget in our code.
import 'package:cached_network_image/cached_network_image.dart';
import 'package:flutter/material.dart';

void main() => runApp(const MyApp());

class MyApp extends StatelessWidget {
  const MyApp({super.key});

  @override
  Widget build(BuildContext context) {
    return MaterialApp(
      home: Scaffold(
        body: Center(
          child: CachedNetworkImage(
            imageUrl: 'https://picsum.photos/id/525/350/250',
          ),
        ),
      ),
    );
  }
}
In the above example, we import the cached_network_image package. After importing the package, we replace the Image.network constructor with the CachedNetworkImage image. In the CachedNetworkImage widget we set the imageUrl property to the URL of our image.
Afterward, we can restart the application and you will see that the image is loaded differently than before. This is because the CachedNetworkImage widget provides a fade animation.

If you want to disable the fade animation your can add the following property to the
CachedNetworkImagewidget:fadeInDuration: Duration.zero.
Improve the Cached Network Image Implementation
The CachedNetworkImage offers more properties that can help us improve the user experience. Let us go over the following example.
import 'package:cached_network_image/cached_network_image.dart';
import 'package:flutter/material.dart';

void main() => runApp(const MyApp());

class MyApp extends StatelessWidget {
  const MyApp({super.key});

  @override
  Widget build(BuildContext context) {
    return MaterialApp(
      home: Scaffold(
        body: Center(
          child: CachedNetworkImage(
            imageUrl: 'https://picsum.photos/id/525/350/250',
            placeholder: (BuildContext context, String url) =>
                const CircularProgressIndicator(),
            errorWidget: (BuildContext context, String url, Object error) =>
                const Icon(
              Icons.no_photography_outlined,
              size: 120,
            ),
          ),
        ),
      ),
    );
  }
}
In the above code snippet, we added the placeholder and errorWidget properties.
The placeholder property allows us to specify a widget that will be displayed while the image is being loaded. In the above example, we use a CircularProgressIndicator widget as the placeholder, which shows a loading spinner.

On the other hand, the errorWidget property allows us to specify a widget that will be displayed if the image fails to load or encounters an error. In the provided code snippet, we use an Icon widget with the Icons.no_photography_outlined icon, indicating that the image could not be found.

The placeholder and errorWidget properties, give us the control to customize the behavior of the CachedNetworkImage widget during the different stages of image loading. Of course, these are not the only available properties.
Difference Between Cached and Regular Images
After implementing the CachedNetworkImage, let us compare its performance with the regular network image.

Initial loading: Both the CachedNetworkImage and NetworkImage have similar initial loading times.
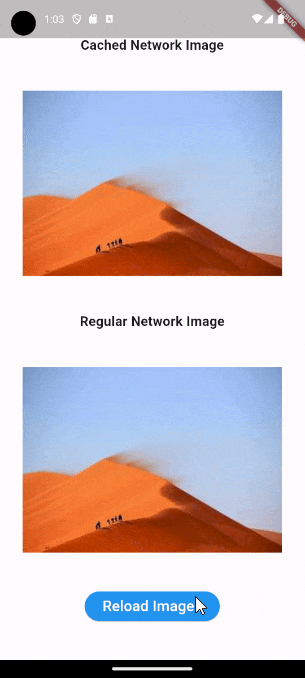
Subsequent loading: However, the true power of the CachedNetworkImage widget shows when we reload the images. The CachedNetworkImage widget loads instantly from the cache, while the regular network image needs to fetch the image again from the URL.
Conclusion
Caching network images in Flutter using the Cached Network Image package is crucial for better performance and user experience. It optimizes image loading, reduces bandwidth usage, and provides a smoother experience for users. It also provides convenient properties to control every stage of the image loading.


